
目录
1、开源代码、模型下载
2、环境配置
3、模型预测
4、onnxruntime测试
1、开源代码、模型下载
代码下载链接:https://github.com/THU-MIG/yolov10

模型下载:

YOLOv10-N:https://github.com/THU-MIG/yolov10/releases/download/v1.1/yolov10n.pt
YOLOv10-S:https://github.com/THU-MIG/yolov10/releases/download/v1.1/yolov10s.pt
YOLOv10-M:https://github.com/THU-MIG/yolov10/releases/download/v1.1/yolov10m.pt
YOLOv10-B:https://github.com/THU-MIG/yolov10/releases/download/v1.1/yolov10b.pt
YOLOv10-L:https://github.com/THU-MIG/yolov10/releases/download/v1.1/yolov10l.pt
YOLOv10-X:https://github.com/THU-MIG/yolov10/releases/download/v1.1/yolov10x.pt
2、环境配置
打开Anaconda3终端,进入base环境,创建新环境
conda create -n yolov10 python=3.9
conda activate yolov10
#cd到yolov10的目录下
pip install -r requirements.txt -i  https://pypi.tuna.tsinghua.edu.cn/simple/
pip install -e .
3、模型预测
安装完成之后,我们简单执行下推理命令测试下效果,默认读取yolov10-main/ultralytics/assets文件夹下的所有图像:
yolo predict model=yolov10s.pt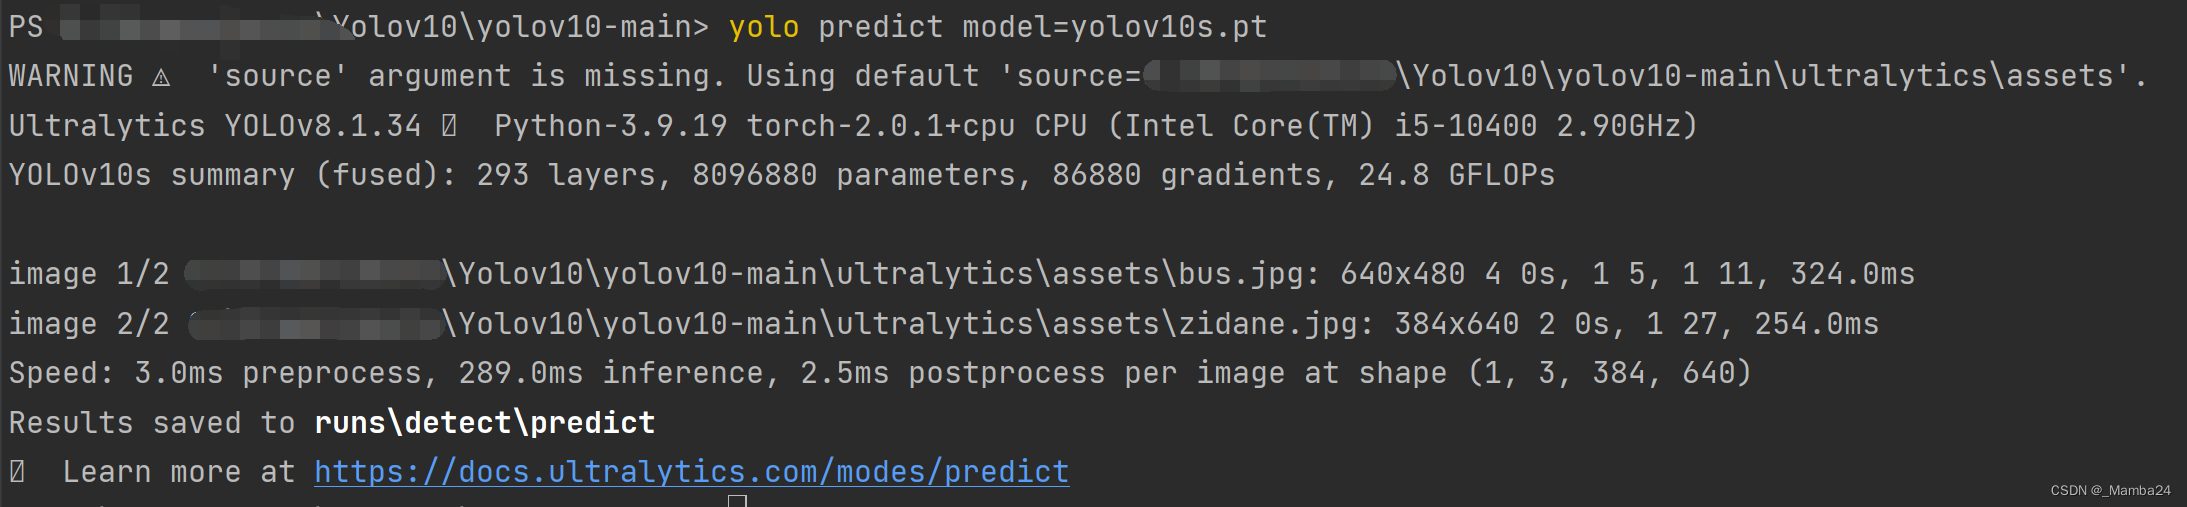
或者使用脚本
from ultralytics import YOLOv10
import glob
import os
import numpy as np
import cv2classes = {0: 'person', 1: 'bicycle', 2: 'car', 3: 'motorcycle', 4: 'airplane', 5: 'bus',6: 'train', 7: 'truck', 8: 'boat', 9: 'traffic light', 10: 'fire hydrant',11: 'stop sign', 12: 'parking meter', 13: 'bench', 14: 'bird', 15: 'cat',16: 'dog', 17: 'horse', 18: 'sheep', 19: 'cow', 20: 'elephant', 21: 'bear',22: 'zebra', 23: 'giraffe', 24: 'backpack', 25: 'umbrella', 26: 'handbag',27: 'tie', 28: 'suitcase', 29: 'frisbee', 30: 'skis', 31: 'snowboard',32: 'sports ball', 33: 'kite', 34: 'baseball bat', 35: 'baseball glove',36: 'skateboard', 37: 'surfboard', 38: 'tennis racket', 39: 'bottle',40: 'wine glass', 41: 'cup', 42: 'fork', 43: 'knife', 44: 'spoon', 45: 'bowl',46: 'banana', 47: 'apple', 48: 'sandwich', 49: 'orange', 50: 'broccoli',51: 'carrot', 52: 'hot dog', 53: 'pizza', 54: 'donut', 55: 'cake',56: 'chair', 57: 'couch', 58: 'potted plant', 59: 'bed', 60: 'dining table',61: 'toilet', 62: 'tv', 63: 'laptop', 64: 'mouse', 65: 'remote', 66: 'keyboard',67: 'cell phone', 68: 'microwave', 69: 'oven', 70: 'toaster', 71: 'sink',72: 'refrigerator', 73: 'book', 74: 'clock', 75: 'vase', 76: 'scissors',77: 'teddy bear', 78: 'hair drier', 79: 'toothbrush'
}
class Colors:"""Ultralytics color palette https://ultralytics.com/."""def __init__(self):"""Initialize colors as hex = matplotlib.colors.TABLEAU_COLORS.values()."""hexs = ('FF3838', 'FF9D97', 'FF701F', 'FFB21D', 'CFD231', '48F90A', '92CC17', '3DDB86', '1A9334', '00D4BB','2C99A8', '00C2FF', '344593', '6473FF', '0018EC', '8438FF', '520085', 'CB38FF', 'FF95C8', 'FF37C7')self.palette = [self.hex2rgb(f'#{c}') for c in hexs]# print(self.palette)self.n = len(self.palette)def __call__(self, i, bgr=False):"""Converts hex color codes to rgb values."""c = self.palette[int(i) % self.n]return (c[2], c[1], c[0]) if bgr else c@staticmethoddef hex2rgb(h): # rgb order (PIL)return tuple(int(h[1 + i:1 + i + 2], 16) for i in (0, 2, 4))colors = Colors() # create instance for 'from utils.plots import colors'imgpath = r'D:\Yolov10\yolov10-main\yolov10-detect\test2'
modelpath = r'D:\Yolov10\yolov10-main\yolov10-detect\yolov10s.pt'
save_dir = imgpath + '_Rst'
os.makedirs(save_dir,exist_ok=True)
model = YOLOv10(modelpath)imgs = glob.glob(os.path.join(imgpath,'*.jpg'))
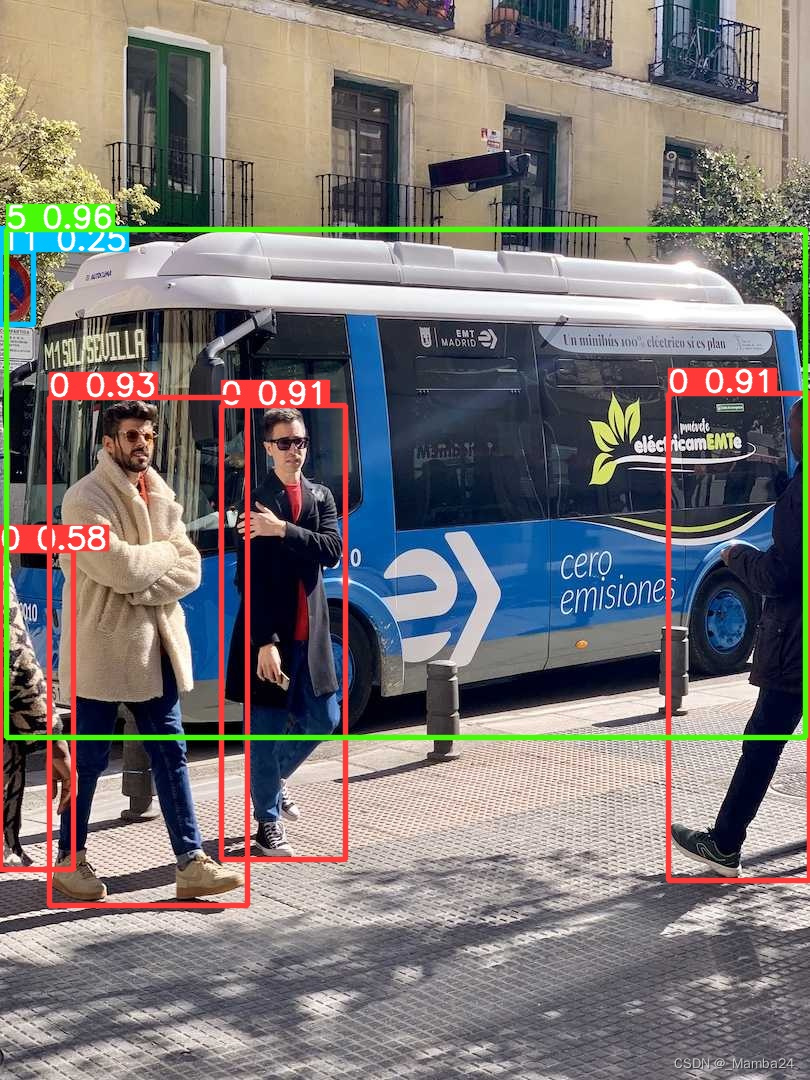
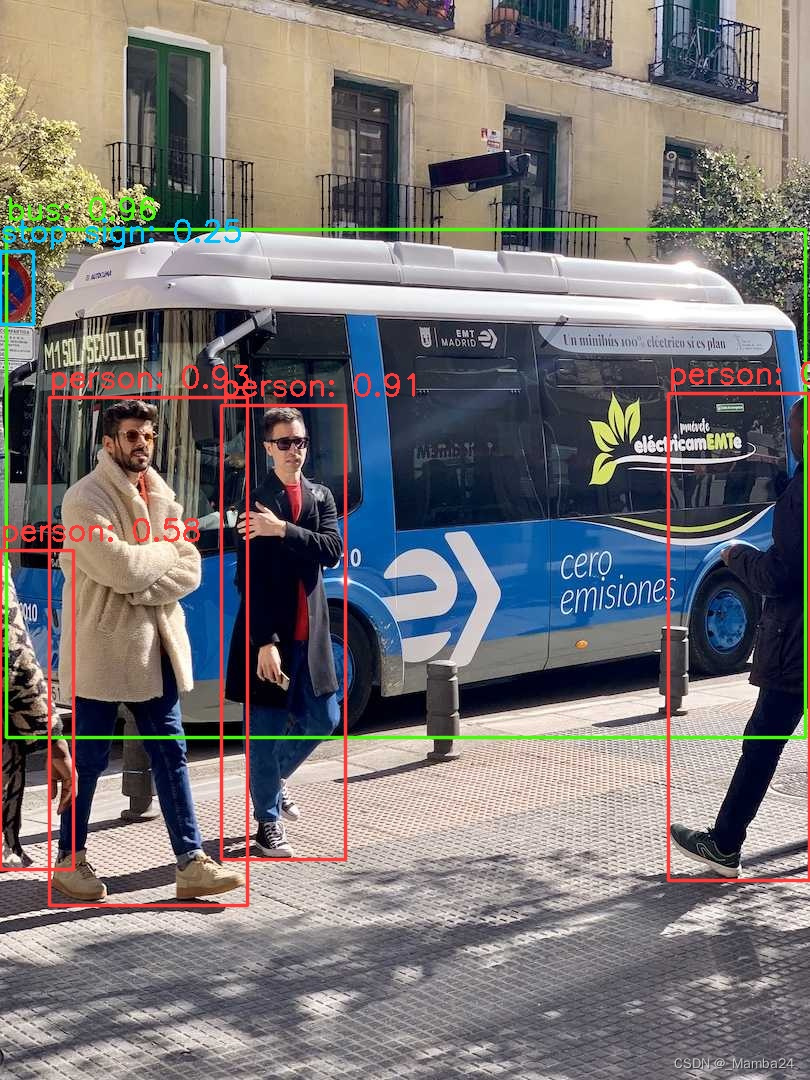
for img in imgs:imgname = img.split('\\')[-1]frame = cv2.imread(img)results = model.predict(img)[0]# results = model(img)for box in results.boxes:# print(box)xyxy = box.xyxy.squeeze().tolist()x1, y1, x2, y2 = int(xyxy[0]), int(xyxy[1]), int(xyxy[2]), int(xyxy[3])c, conf = int(box.cls), float(box.conf)name = classes[c]color = colors(c, True)cv2.rectangle(frame, (int(xyxy[0]), int(xyxy[1])), (int(xyxy[2]), int(xyxy[3])), color, thickness=2, lineType=cv2.LINE_AA)cv2.putText(frame, f"{name}: {conf:.2f}", (x1, y1 - 10), cv2.FONT_HERSHEY_SIMPLEX, 1, color,2)# cv2.imshow('image', frame)# cv2.waitKey(0)cv2.imwrite(save_dir+'\\'+imgname,frame)运行结果如下:
4、onnxruntime测试
(1)onnx模型转换
yolo export model=yolov10s.pt format=onnx opset=13 simplify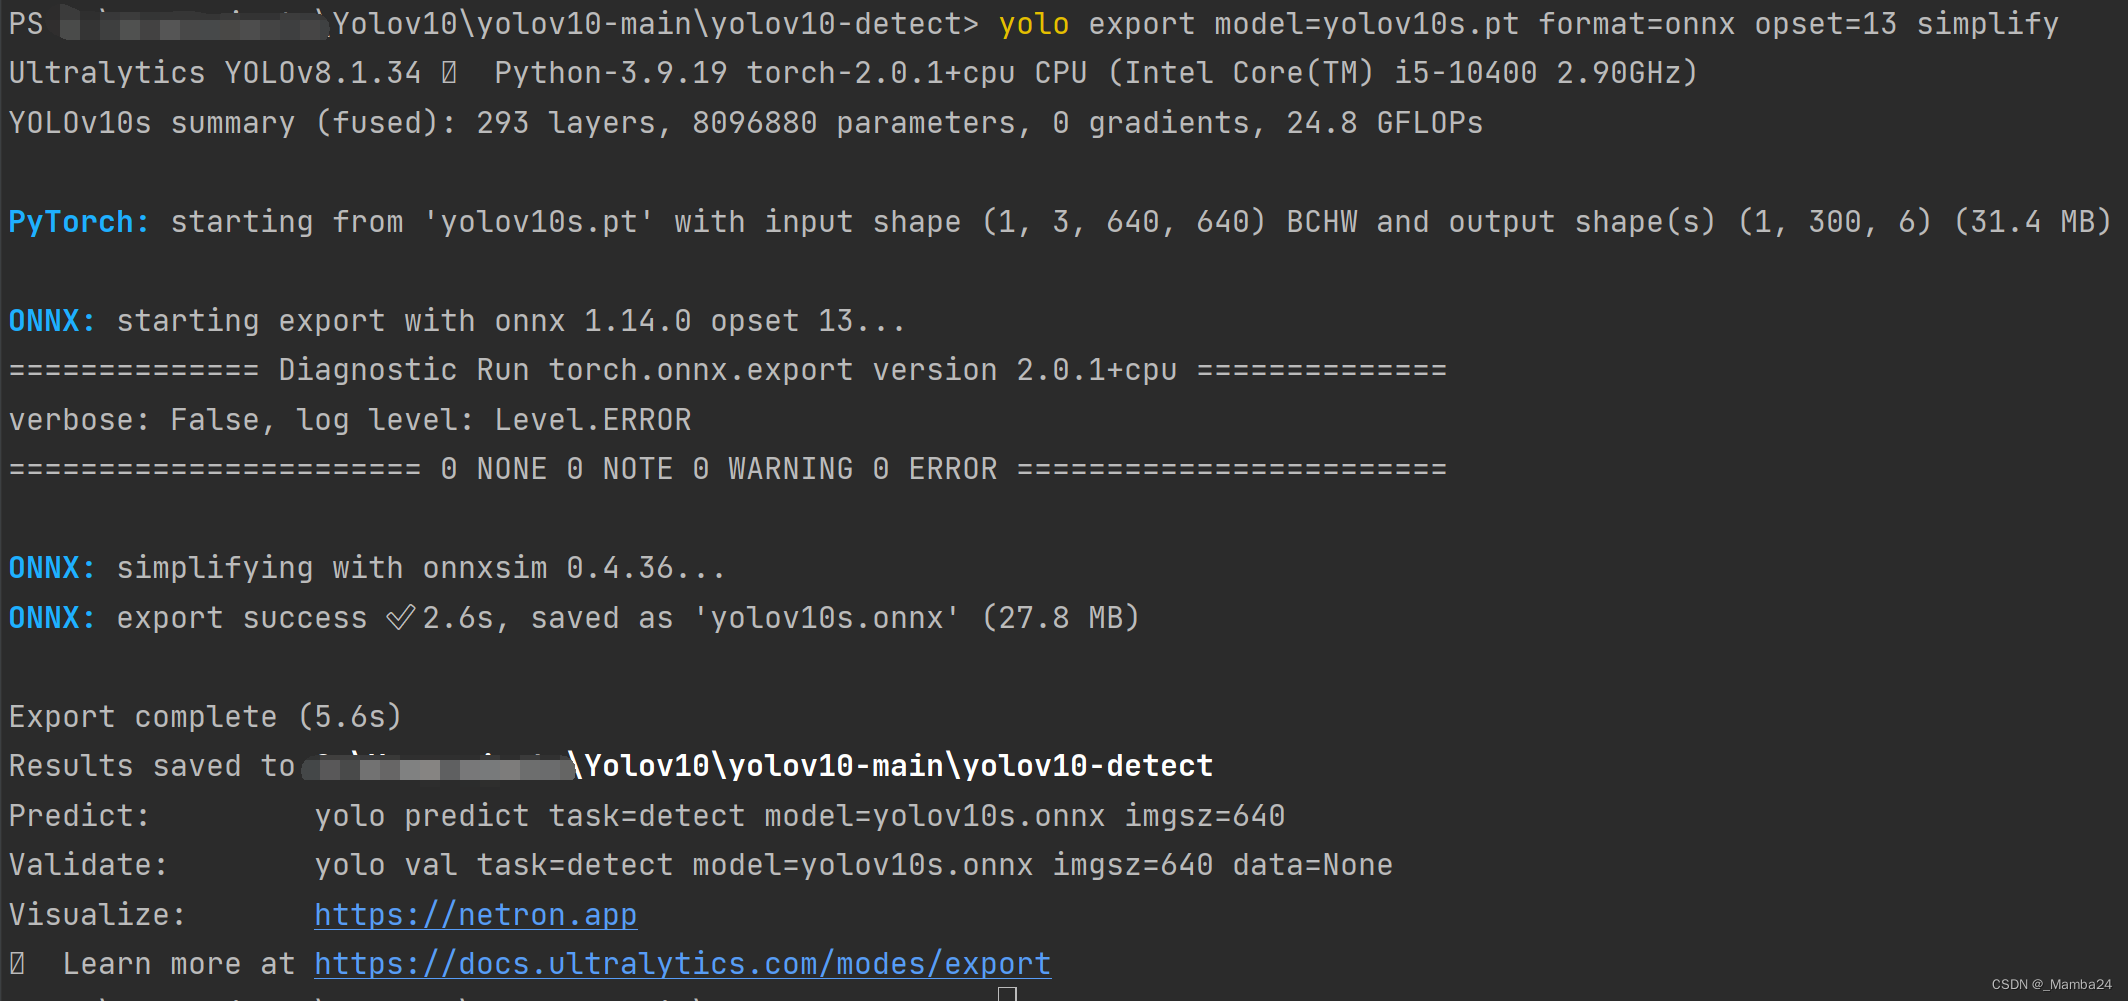
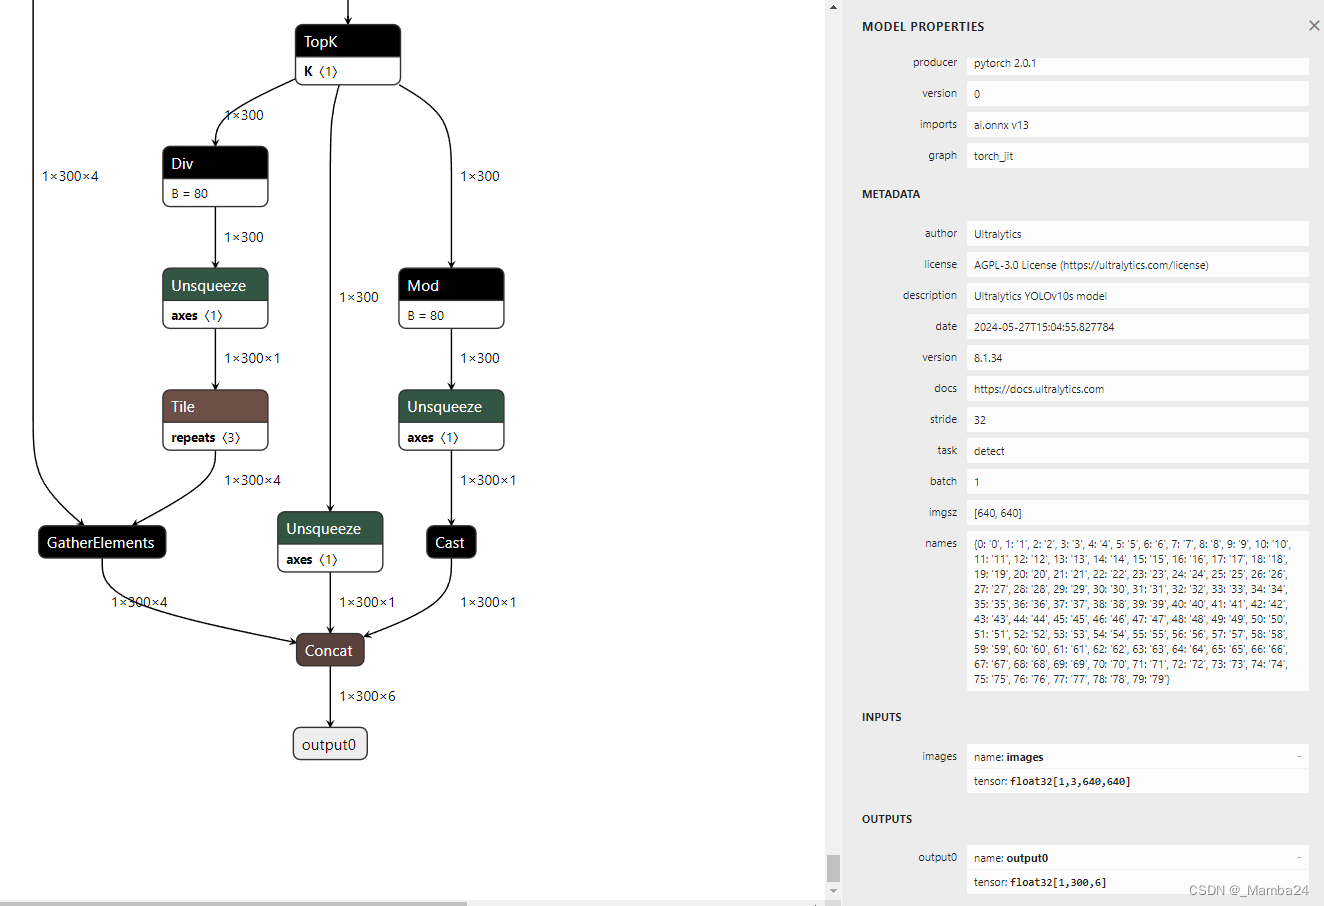
运行后会在文件yolov10s.pt存放路径下生成一个的yolov10s.onnxONNX模型文件
可以通过这个网站Netron查看导出的节点信息:
(2)模型推理
通过 Ultralytics 框架测试下能否正常推理:
yolo predict model=yolov10s.onnx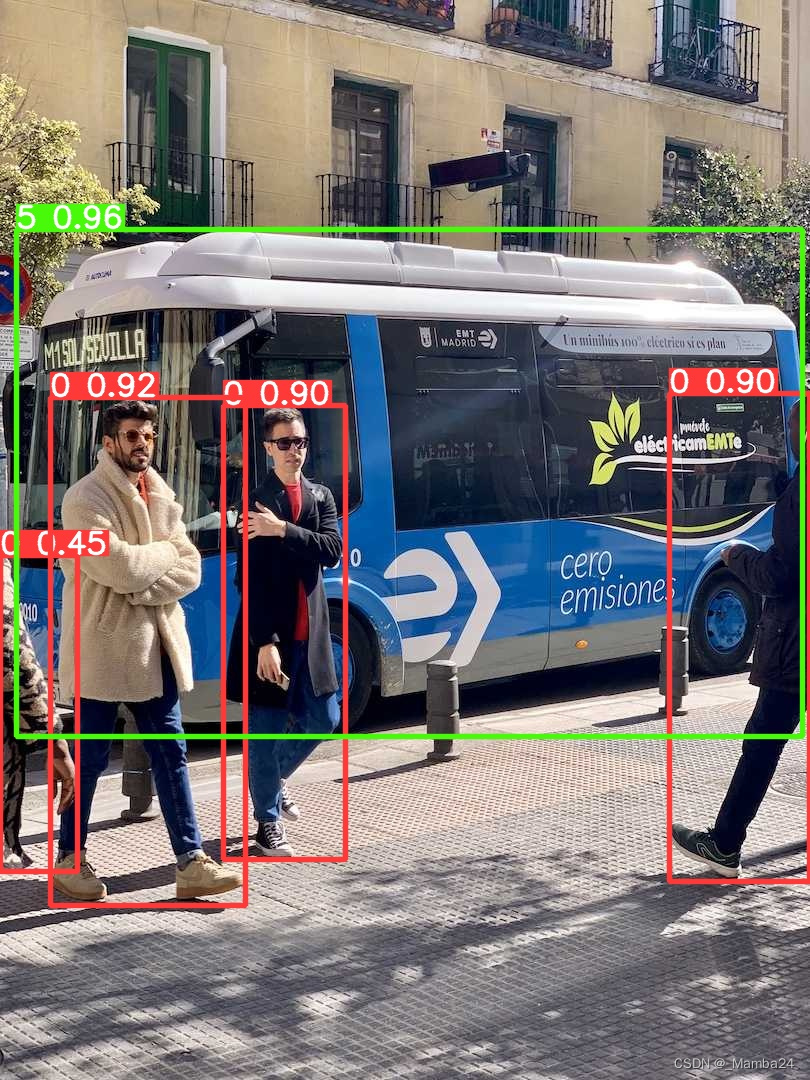
或者使用推理脚本
import glob
import os
import cv2
import numpy as np
import onnxruntime as ortclasses = {0: 'person', 1: 'bicycle', 2: 'car', 3: 'motorcycle', 4: 'airplane', 5: 'bus',6: 'train', 7: 'truck', 8: 'boat', 9: 'traffic light', 10: 'fire hydrant',11: 'stop sign', 12: 'parking meter', 13: 'bench', 14: 'bird', 15: 'cat',16: 'dog', 17: 'horse', 18: 'sheep', 19: 'cow', 20: 'elephant', 21: 'bear',22: 'zebra', 23: 'giraffe', 24: 'backpack', 25: 'umbrella', 26: 'handbag',27: 'tie', 28: 'suitcase', 29: 'frisbee', 30: 'skis', 31: 'snowboard',32: 'sports ball', 33: 'kite', 34: 'baseball bat', 35: 'baseball glove',36: 'skateboard', 37: 'surfboard', 38: 'tennis racket', 39: 'bottle',40: 'wine glass', 41: 'cup', 42: 'fork', 43: 'knife', 44: 'spoon', 45: 'bowl',46: 'banana', 47: 'apple', 48: 'sandwich', 49: 'orange', 50: 'broccoli',51: 'carrot', 52: 'hot dog', 53: 'pizza', 54: 'donut', 55: 'cake',56: 'chair', 57: 'couch', 58: 'potted plant', 59: 'bed', 60: 'dining table',61: 'toilet', 62: 'tv', 63: 'laptop', 64: 'mouse', 65: 'remote', 66: 'keyboard',67: 'cell phone', 68: 'microwave', 69: 'oven', 70: 'toaster', 71: 'sink',72: 'refrigerator', 73: 'book', 74: 'clock', 75: 'vase', 76: 'scissors',77: 'teddy bear', 78: 'hair drier', 79: 'toothbrush'
}
class Colors:"""Ultralytics color palette https://ultralytics.com/."""def __init__(self):"""Initialize colors as hex = matplotlib.colors.TABLEAU_COLORS.values()."""hexs = ('FF3838', 'FF9D97', 'FF701F', 'FFB21D', 'CFD231', '48F90A', '92CC17', '3DDB86', '1A9334', '00D4BB','2C99A8', '00C2FF', '344593', '6473FF', '0018EC', '8438FF', '520085', 'CB38FF', 'FF95C8', 'FF37C7')self.palette = [self.hex2rgb(f'#{c}') for c in hexs]# print(self.palette)self.n = len(self.palette)def __call__(self, i, bgr=False):"""Converts hex color codes to rgb values."""c = self.palette[int(i) % self.n]return (c[2], c[1], c[0]) if bgr else c@staticmethoddef hex2rgb(h):  # rgb order (PIL)return tuple(int(h[1 + i:1 + i + 2], 16) for i in (0, 2, 4))colors = Colors()  # create instance for 'from utils.plots import colors'def letterbox(im,new_shape,color=(114, 114, 114),auto=False,scaleFill=False,scaleup=True,stride=32,
):"""Resize and pad image while meeting stride-multiple constraintsReturns:im (array): (height, width, 3)ratio (array): [w_ratio, h_ratio](dw, dh) (array): [w_padding h_padding]"""shape = im.shape[:2]  # current shape [height, width]if isinstance(new_shape, int):  # [h_rect, w_rect]new_shape = (new_shape, new_shape)# Scale ratio (new / old)r = min(new_shape[0] / shape[0], new_shape[1] / shape[1])if not scaleup:  # only scale down, do not scale up (for better val mAP)r = min(r, 1.0)# Compute paddingratio = r, r  # wh ratiosnew_unpad = int(round(shape[1] * r)), int(round(shape[0] * r))  # w hdw, dh = (new_shape[1] - new_unpad[0],new_shape[0] - new_unpad[1],)  # wh paddingif auto:  # minimum rectangledw, dh = np.mod(dw, stride), np.mod(dh, stride)  # wh paddingelif scaleFill:  # stretchdw, dh = 0.0, 0.0new_unpad = (new_shape[1], new_shape[0])  # [w h]ratio = (new_shape[1] / shape[1],new_shape[0] / shape[0],)  # [w_ratio, h_ratio]dw /= 2  # divide padding into 2 sidesdh /= 2if shape[::-1] != new_unpad:  # resizeim = cv2.resize(im, new_unpad, interpolation=cv2.INTER_LINEAR)top, bottom = int(round(dh - 0.1)), int(round(dh + 0.1))left, right = int(round(dw - 0.1)), int(round(dw + 0.1))im = cv2.copyMakeBorder(im, top, bottom, left, right, cv2.BORDER_CONSTANT, value=color)return im, ratio, (dw, dh)def rescale_coords(boxes, image_shape, input_shape):image_height, image_width = image_shapeinput_height, input_width = input_shapescale = min(input_width / image_width, input_height / image_height)pad_w = (input_width - image_width * scale) / 2pad_h = (input_height - image_height * scale) / 2boxes[:, [0, 2]] = (boxes[:, [0, 2]] - pad_w) / scaleboxes[:, [1, 3]] = (boxes[:, [1, 3]] - pad_h) / scaleboxes[:, [0, 2]] = np.clip(boxes[:, [0, 2]], 0, image_width)boxes[:, [1, 3]] = np.clip(boxes[:, [1, 3]], 0, image_height)return boxes.astype(int)def preprocess(image, input_shape):# Resizeinput_img = letterbox(image, input_shape)[0]# Transposeinput_img = input_img[..., ::-1].transpose(2, 0, 1)# Expandinput_img = input_img[np.newaxis, :, :, :].astype(np.float32)# Contiguousinput_img = np.ascontiguousarray(input_img)# Normblob = input_img / 255.0return blobdef postprocess(outs, conf_thres, image_shape, input_shape):# Filtered by confouts = outs[outs[:, 4] >= conf_thres]# Extractboxes = outs[:, :4]scores = outs[:, -2]labels = outs[:, -1].astype(int)# Rescaleboxes = rescale_coords(boxes, image_shape, input_shape)return boxes, scores, labelsdef main():conf_thres = 0.25input_shape = (640, 640)image_path = r'D:\Yolov10\yolov10-main\ultralytics\assets'save_path = image_path + '_Rst'os.makedirs(save_path,exist_ok=True)model_path = r'D:\Yolov10\yolov10-main\yolov10-detect\yolov10s.onnx'ort_model = ort.InferenceSession(model_path)imgs = glob.glob(os.path.join(image_path,'*.jpg'))imgs.sort()for img in imgs:imgname = img.split('\\')[-1]# Preprocessim0 = cv2.imread(img)image_shape = im0.shape[:2]blob = preprocess(im0, input_shape)# Inferenceouts = ort_model.run(None, {'images': blob})[0][0]# Postprocessboxes, scores, labels = postprocess(outs, conf_thres, image_shape, input_shape)# 保存结果for label, score, box in zip(labels, scores, boxes):label_text = f'{classes[label]}: {score:.2f}'color = colors(label,True)cv2.rectangle(im0, (box[0], box[1]), (box[2], box[3]), color, thickness=2, lineType=cv2.LINE_AA)cv2.putText(im0, label_text, (box[0], box[1] - 10), cv2.FONT_HERSHEY_SIMPLEX, 0.5, color, 2)# cv2.imshow('image', im0)# cv2.waitKey(0)cv2.imwrite(save_path+'\\'+imgname, im0)if __name__ == '__main__':main()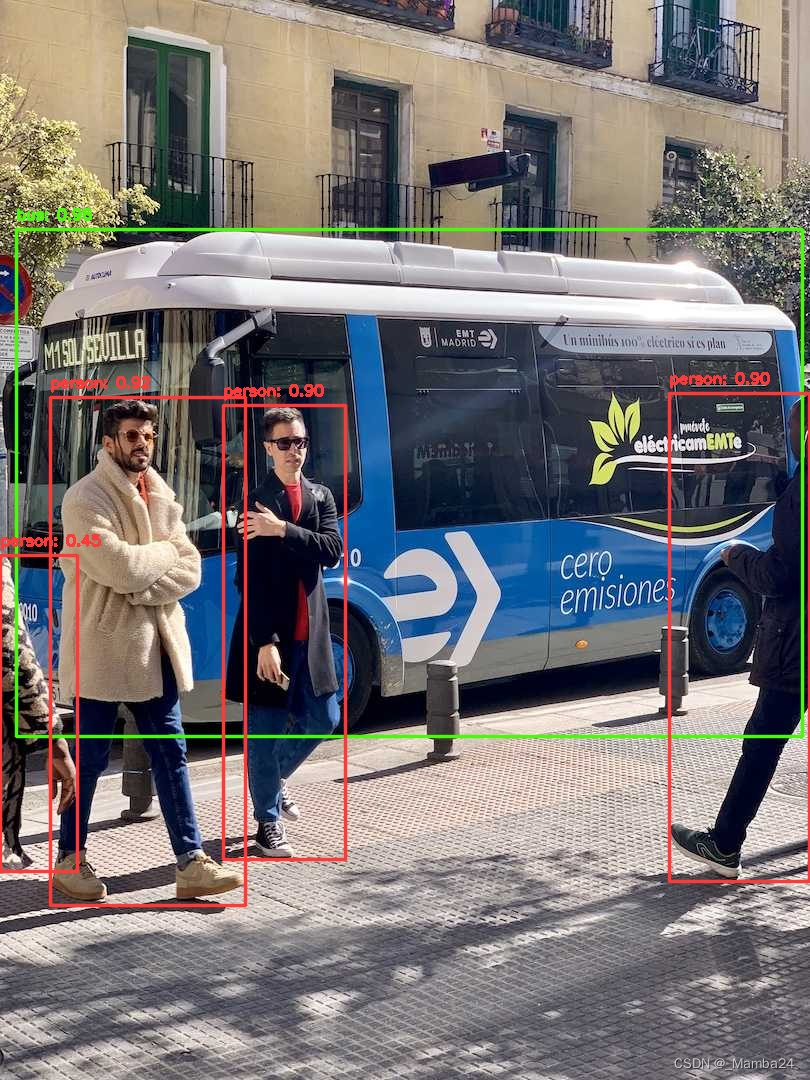
参考:YOLOv10 正式发布!原理、部署、应用一站式齐全-CSDN博客


