
第四章:代码修错与引入pinia进行状态管理
不影响运行的警告bug修复
解决项目启动警告
- 在进入消息组件的编写之前,我们可以发现一个问题
-
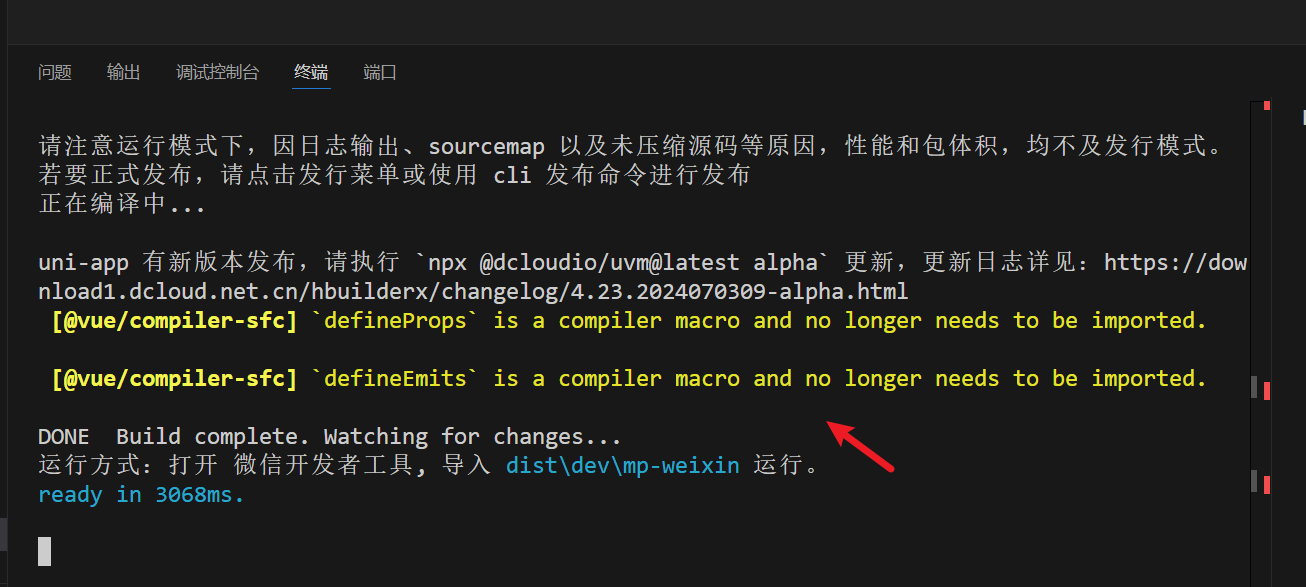
启动命令的时候会出现这个黄色警告
-
这个黄色警告的意思就是 defineProps组件被默认导入了,可以不需要手动导入,叫你去掉
-
不去掉也可也

- 搜索即可
defineEmits
defineProps

- 使用ctrl+c结束运行,然后再次进行编译,可以发现这次以及没有黄色报错

去除post多余的navigator
- 原本代码中,多写了一个navigator
<script setup>
const navigateToPostDetails = () => {uni.navigateTo({url: '/components/Post/PostDetails',})
}
</script><template><view class="container" @click="navigateToPostDetails"><!-- 评论组件 --><navigator url="/pages/index/Posts/PostDetails" class="reply-navigator"><view class="reply"><image class="reply-profile-image" src="/static/logo.png" /><view class="reply-info"><view class="reply-user"><text class="reply-name">Qiuner</text><text class="reply-handle">22级 · 5天</text></view><text class="reply-text">福信校园通是一个校园社交软件,在这里你可以分享你的想法、发现新事物、与志同道合的人互动。</text></view></view></navigator><view class="post-image-container"><view class="post-image" style="background-color: #1da1f2"><!-- 蓝色背景替代图片部分 --></view></view><view class="post-footer"></view></view>
</template><style>
.container {padding: 1rem;margin-top: calc(env(safe-area-inset-top) + 2rem);
}.reply {display: flex;padding: 1rem 0;border-top: 0.0625rem solid #ddd;
}
.reply-profile-image {width: 1.875rem;height: 1.875rem;border-radius: 50%;
}
.reply-info {flex: 1;margin-left: 0.625rem;
}
.reply-user {display: flex;align-items: center;
}
.reply-name {font-weight: bold;
}
.reply-handle {color: grey;margin-left: 0.3125rem;
}
.reply-text {margin-top: 0.3125rem;
}.post-image-container {display: flex;justify-content: center;
}
.post-image {width: 100%;max-width: 100%;height: 12rem;border: 0.0625rem solid #ddd;
}
.post-footer {color: grey;
}.reply-navigator,
.post-image-navigator {display: block;
}
</style>
解决组织页面出现错误问题

解决不是使用uniapp兼容图片加载

“Image is not defined in this environment” 表示 Image 对象在当前环境中不可用
改动前
// 预加载图片
function preloadImage(src: string) {if (typeof Image !== 'undefined') {const img = new Image()img.src = src} else {console.warn('Image is not defined in this environment')}
}
改动后
// 预加载图片
function preloadImage(src: string) {uni.getImageInfo({src,success: () => console.log(`Image loaded: ${src}`),fail: (err) => console.warn(`Failed to load image: ${src}`, err),})
}
总体代码
<template><view class="container"><!-- 页面其他内容 --><image class="add-button" :src="buttonImage" @click="handleClick"></image></view>
</template><script setup lang="ts">
import { ref, computed, nextTick } from 'vue'// 定义响应式变量
const isAddButton1 = ref(true)// 切换图片和跳转页面的方法
const handleClick = () => {isAddButton1.value = !isAddButton1.value// 如果切换后的状态是 AddButton1,进行页面跳转if (isAddButton1.value) {nextTick(() => {setTimeout(() => {uni.navigateTo({url: '/pages/writing/writing',fail: (err) => {console.error('Navigation Error:', err)},})}, 100) // 延迟时间可以根据实际需要调整})}
}// 预加载图片
function preloadImage(src: string) {uni.getImageInfo({src,success: () => {// 成功时不进行任何操作},fail: (err) => {console.warn(`Failed to load image: ${src}`, err)},})
}// 预加载图片
preloadImage('/static/add/AddButton1.png')
preloadImage('/static/add/AddButton2.png')// 图片路径的计算属性
const buttonImage = computed(() =>isAddButton1.value ? '/static/add/AddButton1.png' : '/static/add/AddButton2.png',
)
</script><style scoped>
.container {position: relative;width: 100%;height: 100vh;background-color: #f0f0f0;
}.add-button {position: fixed;right: 5%; /* 调整按钮的水平位置 */bottom: 5%; /* 调整按钮的位置,使其在导航栏上方 */width: 20vw; /* 相对屏幕宽度的按钮宽度 */height: 20vw; /* 相对屏幕宽度的按钮高度 */cursor: pointer;
}
</style>
页面状态缓存清除
- 现在页面还面对着以下问题

- 是的 在切换回页面的时候能够发现侧边栏目状态没有刷新
认识uniapp生命周期(重点)
- 想要解决这个问题我们需要先来认识一下uniapp的生命周期
- 生命周期,故名思意,一颗树的生命周期是从小种子开始,再发芽、长大、衰老、死亡。
- 也就是说一颗树的生命周期有
- 一:种子期
- 二:发芽期
- 三:长大期
- 四:衰老期
- 五:死亡期
- 你知道了在五分钟后,你面前的这颗树要进入发芽期,那你就可以对这个树进行操作。因为你知道了它的位置、时间。
- 你可以选择在这颗树进入发芽期的时候浇水,也可以什么都不做。但你不能在种子期之前对树进行操作,因为那个时候树还不存在,连种子都不是。
- 和树一样,页面和组件也存在着生命周期,也存在着操作,因此知道时间(处于什么生命周期)位置(处于哪里)后,就能对这个生命周期的页面进行操作。
- 下面是uniapp的生命周期
页面生命周期
| 钩子名称 | 触发时机 | 用途 |
|---|---|---|
onLoad | 页面首次加载时 | 页面初始化操作,如获取数据、设置页面初始状态 |
onShow | 页面显示时(包括从其他页面返回时) | 页面显示时的操作,如更新数据、记录用户行为 |
onReady | 页面初次渲染完成时 | 页面渲染完成后的操作,如初始化插件、开始动画 |
onHide | 页面隐藏时(如切换到其他页面或应用被切换到后台) | 保存页面状态、停止动画、清理定时器 |
onUnload | 页面卸载时(如退出页面或页面被销毁) | 页面销毁前的清理操作,如释放资源、清除缓存 |
onTabItemTap | 用户点击 TabBar 的某一项时 | 处理 TabBar 项的点击事件 |
组件生命周期
| 钩子名称 | 触发时机 | 用途 |
|---|---|---|
onBeforeMount | 组件挂载前 | 组件创建之前的准备工作 |
onMounted | 组件挂载后 | 组件挂载后的操作,如数据获取、DOM 操作 |
onBeforeUpdate | 组件数据更新前 | 数据更新之前进行操作 |
onUpdated | 组件数据更新后 | 数据更新之后执行操作,如操作新的 DOM 元素 |
onBeforeUnmount | 组件卸载前 | 组件卸载之前的清理工作 |
onUnmounted | 组件卸载后 | 组件卸载后的清理工作 |
解决页面状态缓存方案一:手动记录每个操作的元素,然后在退出的时候刷新状态
<script setup lang="ts">
import { ref, onShow } from 'vue'
import AddButton from '@/components/AddButton.vue'
import Posts from '@/components/Post/Post.vue'
import TabHeader from '@/components/HeadPortrait/TabHeader.vue'import '@/styles/IndexAndMessage.css'const currentTab = ref(0)// 切换选项卡的方法
const changeTab = (index: number) => {currentTab.value = index
}// 监听滑动事件,实现选项卡动态切换
const onSwiperChange = (e: any) => {currentTab.value = e.detail.current
}// 重置状态到默认值
onShow(() => {currentTab.value = 0
})
</script><template><TabHeader /><!-- 顶部导航栏 --><view class="header"><view class="tab-container"><view class="tab" :class="{ active: currentTab === 0 }" @click="changeTab(0)"><text>为您推荐</text></view><view class="tab" :class="{ active: currentTab === 1 }" @click="changeTab(1)"><text>正在关注</text></view></view></view><!-- 滑动内容区 --><swiper :current="currentTab" @change="onSwiperChange" style="height: 100vh"><!-- 为您推荐内容 --><swiper-item><view class="content"><Posts /></view></swiper-item><!-- 正在关注内容 --><swiper-item><view class="content">正在关注的内容</view></swiper-item></swiper><!-- 添加按钮 --><AddButton />
</template>
解决页面状态缓存方案二:使用不缓存页面的跳转
- 原本是用 uni.navigateTo({
- 换成 uni.redirectTo
解决页面状态缓存方案三:在 onHide 钩子中清除缓存,在 onShow 钩子中重置状态:
<script setup lang="ts">
import { ref } from 'vue'
import { onShow, onHide } from '@dcloudio/uni-app'import AddButton from '@/components/AddButton.vue'
import Posts from '@/components/Post/Post.vue'
import TabHeader from '@/components/HeadPortrait/TabHeader.vue'import '@/styles/IndexAndMessage.css'const currentTab = ref(0)// 切换选项卡的方法
const changeTab = (index: number) => {currentTab.value = index
}// 监听滑动事件,实现选项卡动态切换
const onSwiperChange = (e: any) => {currentTab.value = e.detail.current
}// 在页面隐藏时重置状态
onHide(() => {uni.removeStorage({key: 'currentTab',})
})// 在页面显示时恢复默认状态
onShow(() => {uni.getStorage({key: 'currentTab',success: (res) => {currentTab.value = res.data || 0},fail: () => {currentTab.value = 0},})
})
</script><template><TabHeader /><!-- 顶部导航栏 --><view class="header"><view class="tab-container"><view class="tab" :class="{ active: currentTab === 0 }" @click="changeTab(0)"><text>为您推荐</text></view><view class="tab" :class="{ active: currentTab === 1 }" @click="changeTab(1)"><text>正在关注</text></view></view></view><!-- 滑动内容区 --><swiper :current="currentTab" @change="onSwiperChange" style="height: 100vh"><!-- 为您推荐内容 --><swiper-item><view class="content"><Posts /></view></swiper-item><!-- 正在关注内容 --><swiper-item><view class="content">正在关注的内容</view></swiper-item></swiper><!-- 添加按钮 --><AddButton />
</template>
解决页面状态缓存方案四:使用状态管理工具pinia
-
使用pinia的方法会比较繁琐,但pinia在后面中需要使用,因此我们可以先使用使用一些
-
使用pinia的步骤
安装
pnpm add pinia
配置
import { createApp } from 'vue'
import { createPinia } from 'pinia'
import App from './App.vue'
import router from './router'const app = createApp(App)app.use(createPinia())
app.use(router)
app.mount('#app')
创建实例
import { defineStore } from 'pinia'export const useTabStore = defineStore('tab', {state: () => ({currentTab: 0 // 默认选中的标签页索引}),actions: {setTab(index: number) {this.currentTab = index},resetTab() {this.currentTab = 0}}
})
在组件中使用……

- 可以看到我们再项目一开始就已经安装号了pinia,因此我们直接进入配置阶段
第二步:创建pinia实例并导出

import { createPinia } from 'pinia'
import persist from 'pinia-plugin-persistedstate'// 创建pinia实例
const pinia = createPinia()// 使用持久化插件
pinia.use(persist)export default pinia- 这里创建了pinia、使用插件简化操作然后导出
import { createSSRApp } from 'vue'
import App from './App.vue'
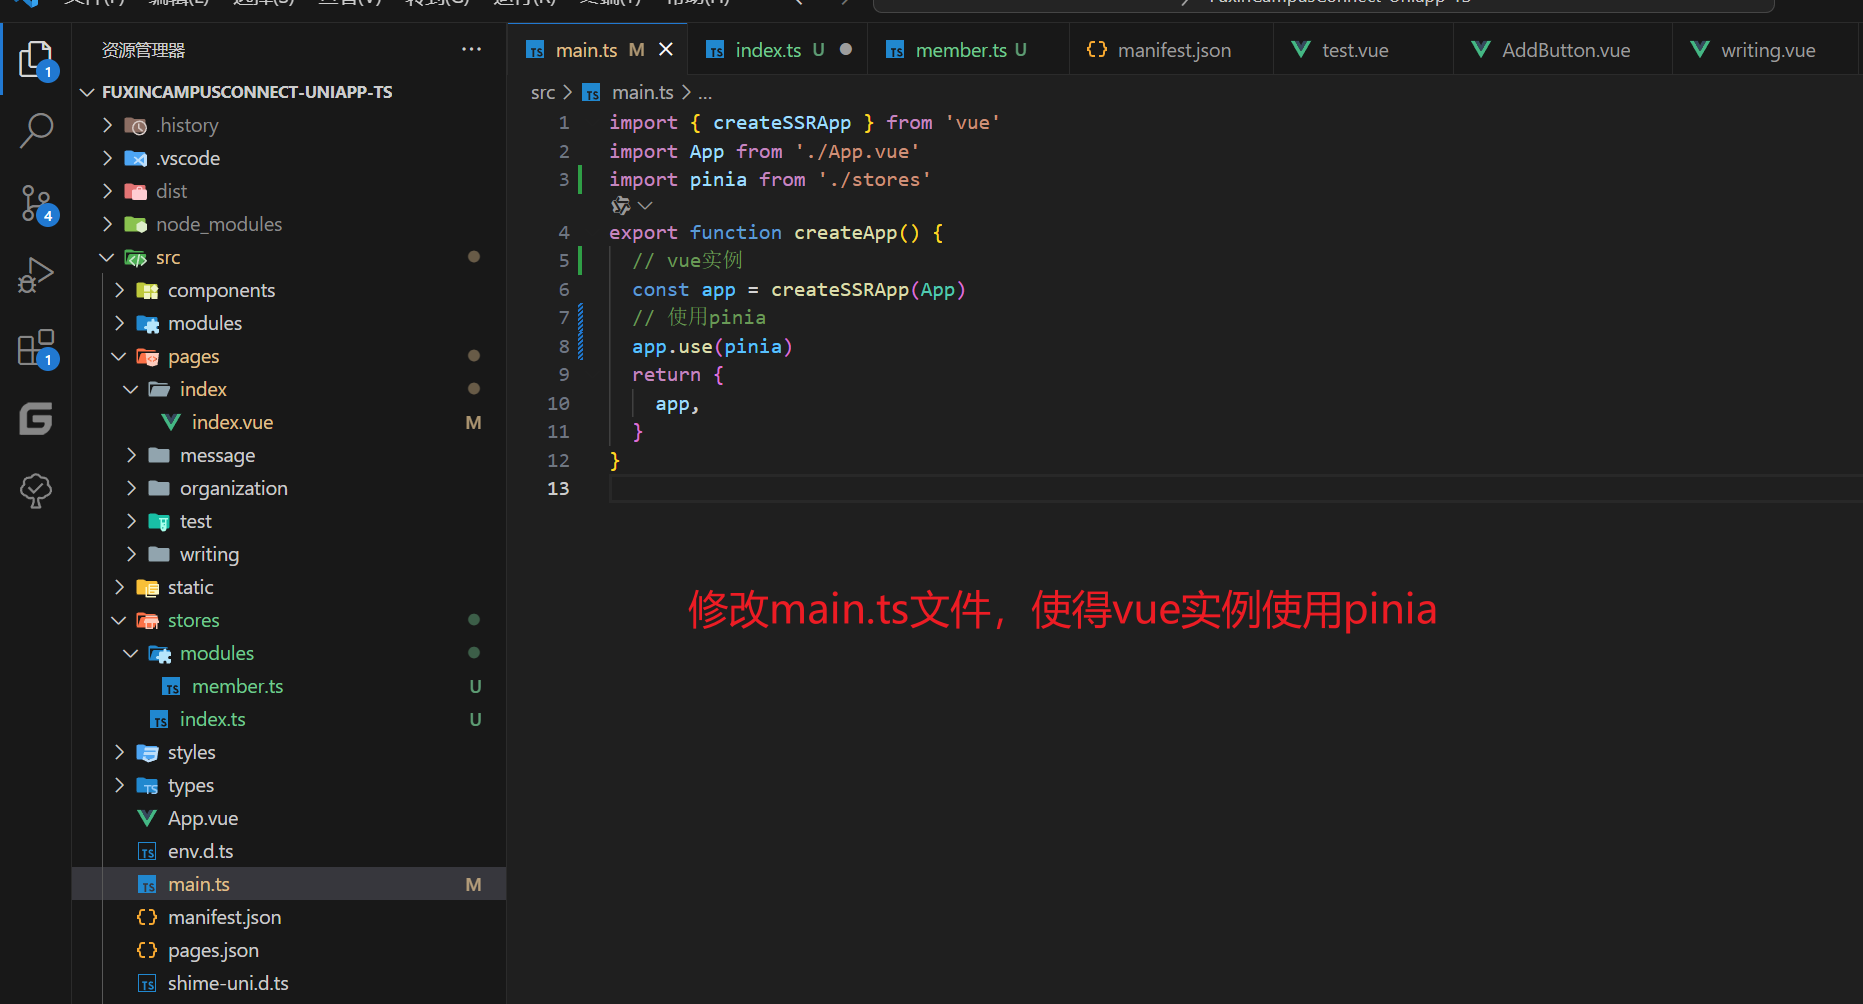
import pinia from './stores'
export function createApp() {// vue实例const app = createSSRApp(App)// 使用piniaapp.use(pinia)return {app,}
}第三步:编写代码 将currentTab的值统一给pinia管理

// src/stores/indexStore.ts
import { defineStore } from 'pinia'export const useIndexStore = defineStore('indexStore', {state: () => ({currentTab: 0, // 0 表示为您推荐,1 表示正在关注}),actions: {changeTab(index: number) {this.currentTab = index},resetTab() {this.currentTab = 0 // 重置为默认状态},},
})- 然后在项目中引用即可
第四步:在项目中使用

<script setup lang="ts">
import AddButton from '@/components/AddButton.vue'
import Posts from '@/components/Post/Post.vue'
import TabHeader from '@/components/HeadPortrait/TabHeader.vue'
import '@/styles/IndexAndMessage.css'
import type { SwiperChangeEvent } from '@/types/index'
import { onShow } from '@dcloudio/uni-app'
import { useIndexStore } from '@/stores/modules/indexStore'const indexStore = useIndexStore()onShow(() => {indexStore.resetTab()
})
</script><template><TabHeader /><!-- 顶部导航栏 --><view class="header"><view class="tab-container"><viewclass="tab":class="{ active: indexStore.currentTab === 0 }"@click="indexStore.changeTab(0)"><text>为您推荐</text></view><viewclass="tab":class="{ active: indexStore.currentTab === 1 }"@click="indexStore.changeTab(1)"><text>正在关注</text></view></view></view><!-- 滑动内容区 --><swiper:current="indexStore.currentTab"@change="(e: SwiperChangeEvent) => indexStore.changeTab(e.detail.current)"style="height: 100vh"><!-- 为您推荐内容 --><swiper-item><view class="content"><Posts /></view></swiper-item><!-- 正在关注内容 --><swiper-item><view class="content">正在关注的内容</view></swiper-item></swiper><!-- 添加按钮 --><AddButton />
</template>- 需要注意的是,我们是一个TS类型的项目
@change="(e: SwiperChangeEvent) => indexStore.changeTab(e.detail.current)"
因此这样写代码而不是
@change="(e) => indexStore.changeTab(e.detail.current)"
-
这样写代码没有指定e的类型,因此无法通过编译
-
至于类型文件,我们不像之前一样卸载文件中,而是写在types文件夹中
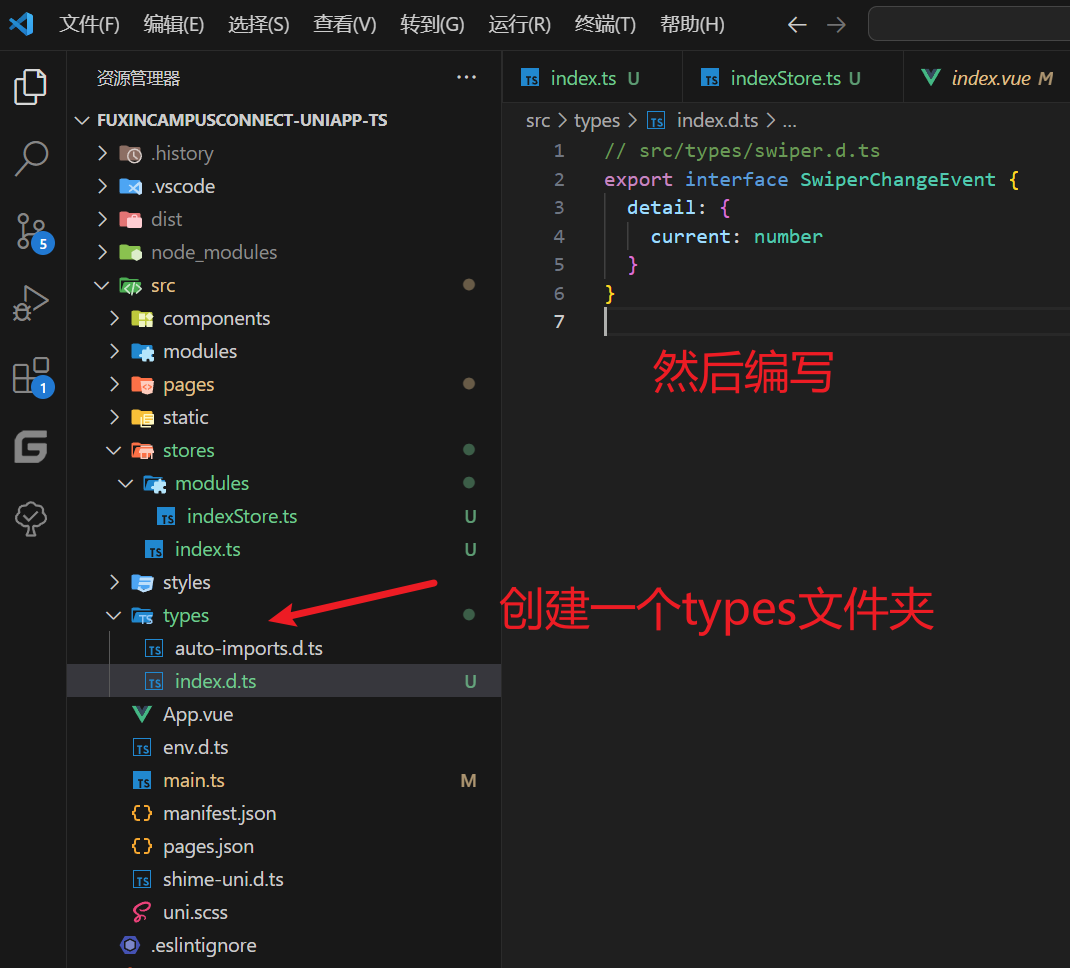
// src/types/swiper.d.ts
export interface SwiperChangeEvent {detail: {current: number}
}
最终效果
- 这样就能通过编译了,而且也实现了功能
在这里插入图片描述
在这里插入图片描述
用上pinia了吗?
- 但这里,使用了pinia了吗?
- pinia的作用是将数据持久化,那么数据持久化到了哪里?
验证数据持久化

- 观看以上动图,可以发现数据并没有存储进pinia中,因为我们只靠onShow方法进行了重置,并没有配置持久化的东西
如何持久化?

import { defineStore } from 'pinia'export const useIndexAndMessageStore = defineStore('indexStoreAndMessage', {state: () => ({currentTab: 0, // 0 表示为您推荐,1 表示正在关注}),actions: {changeTab(index: number) {this.currentTab = index},resetTab() {this.currentTab = 0 // 重置为默认状态},},persist: {// 调整为兼容多端的APIstorage: {getItem(key) {return uni.getStorageSync(key)},setItem(key, value) {uni.setStorageSync(key, value)},},},
})
- 这样再次操作就能发现数据已经持久化成功
- 但这样将数据持久化后会有一个大的bug,会导致顶部导航栏一致反复横跳。
给消息界面、写作按钮、左侧弹出栏添加相同的处理
- 如动图所示,我们的代码目前还面对着以下问题

消息界面导航栏状态管理
- 因为这两边代码基本一致,所以我们直接进行更改之前的文件名,然后进行复制

index
<script setup lang="ts">
import AddButton from '@/components/AddButton.vue'
import Posts from '@/components/Post/Post.vue'
import TabHeader from '@/components/HeadPortrait/TabHeader.vue'
import '@/styles/IndexAndMessage.css'
import { onShow } from '@dcloudio/uni-app'
import { useIndexAndMessageStore } from '@/stores/modules/indexAndMessageStore'
import type { SwiperChangeEvent } from '@/types/indexAndMessageStore'// 使用 Pinia Store
const indexAndMessageStore = useIndexAndMessageStore()// 页面显示时重置 tab 状态
onShow(() => {indexAndMessageStore.resetTab()
})
</script><template><TabHeader /><!-- 顶部导航栏 --><view class="header"><view class="tab-container"><viewclass="tab":class="{ active: indexAndMessageStore.currentTab === 0 }"@click="indexAndMessageStore.changeTab(0)"><text>为您推荐</text></view><viewclass="tab":class="{ active: indexAndMessageStore.currentTab === 1 }"@click="indexAndMessageStore.changeTab(1)"><text>正在关注</text></view></view></view><!-- 滑动内容区 --><swiper:current="indexAndMessageStore.currentTab"@change="(e: SwiperChangeEvent) => indexAndMessageStore.changeTab(e.detail.current)"style="height: 100vh"><!-- 为您推荐内容 --><swiper-item><view class="content"><Posts /></view></swiper-item><!-- 正在关注内容 --><swiper-item><view class="content">正在关注的内容</view></swiper-item></swiper><!-- 添加按钮 --><AddButton />
</template><style lang="scss"></style>
message
<script setup lang="ts">
import AddButton from '@/components/AddButton.vue'
import TabHeader from '@/components/HeadPortrait/TabHeader.vue'
import '@/styles/IndexAndMessage.css'
import { useIndexAndMessageStore } from '@/stores/modules/indexAndMessageStore'
import { onShow } from '@dcloudio/uni-app'
import type { SwiperChangeEvent } from '@/types/indexAndMessageStore'// 使用 Pinia Store
const indexAndMessageStore = useIndexAndMessageStore()// 页面显示时重置 tab 状态
onShow(() => {indexAndMessageStore.resetTab()
})
</script><template><TabHeader /><!-- 顶部导航栏 --><view class="header"><view class="tab-container"><viewclass="tab":class="{ active: indexAndMessageStore.currentTab === 0 }"@click="indexAndMessageStore.changeTab(0)"><text>全部</text></view><viewclass="tab":class="{ active: indexAndMessageStore.currentTab === 1 }"@click="indexAndMessageStore.changeTab(1)"><text>点赞</text></view><viewclass="tab":class="{ active: indexAndMessageStore.currentTab === 2 }"@click="indexAndMessageStore.changeTab(2)"><text>回复</text></view></view></view><!-- 滑动内容区 --><swiper:current="indexAndMessageStore.currentTab"@change="(e: SwiperChangeEvent) => indexAndMessageStore.changeTab(e.detail.current)"style="height: 100vh"><!-- 全部内容 --><swiper-item><view class="content"><!-- 这里是“全部”的内容 --><p>这是全部</p></view></swiper-item><!-- 点赞内容 --><swiper-item><view class="content"><p>这是点赞</p></view></swiper-item><!-- 回复内容 --><swiper-item><view class="content"><p>这是回复</p></view></swiper-item></swiper><!-- 添加按钮 --><AddButton />
</template><style lang="scss"></style>
indexAndMessageStore
// src/stores/indexStore.ts
import { defineStore } from 'pinia'export const useIndexAndMessageStore = defineStore('indexStoreAndMessage', {state: () => ({currentTab: 0, // 0 表示为您推荐,1 表示正在关注}),actions: {changeTab(index: number) {this.currentTab = index},resetTab() {this.currentTab = 0 // 重置为默认状态},},
})
indexAndMessageStore.d
// src/types/swiper.d.ts
export interface SwiperChangeEvent {detail: {current: number}
}
添加对写作按钮的处理
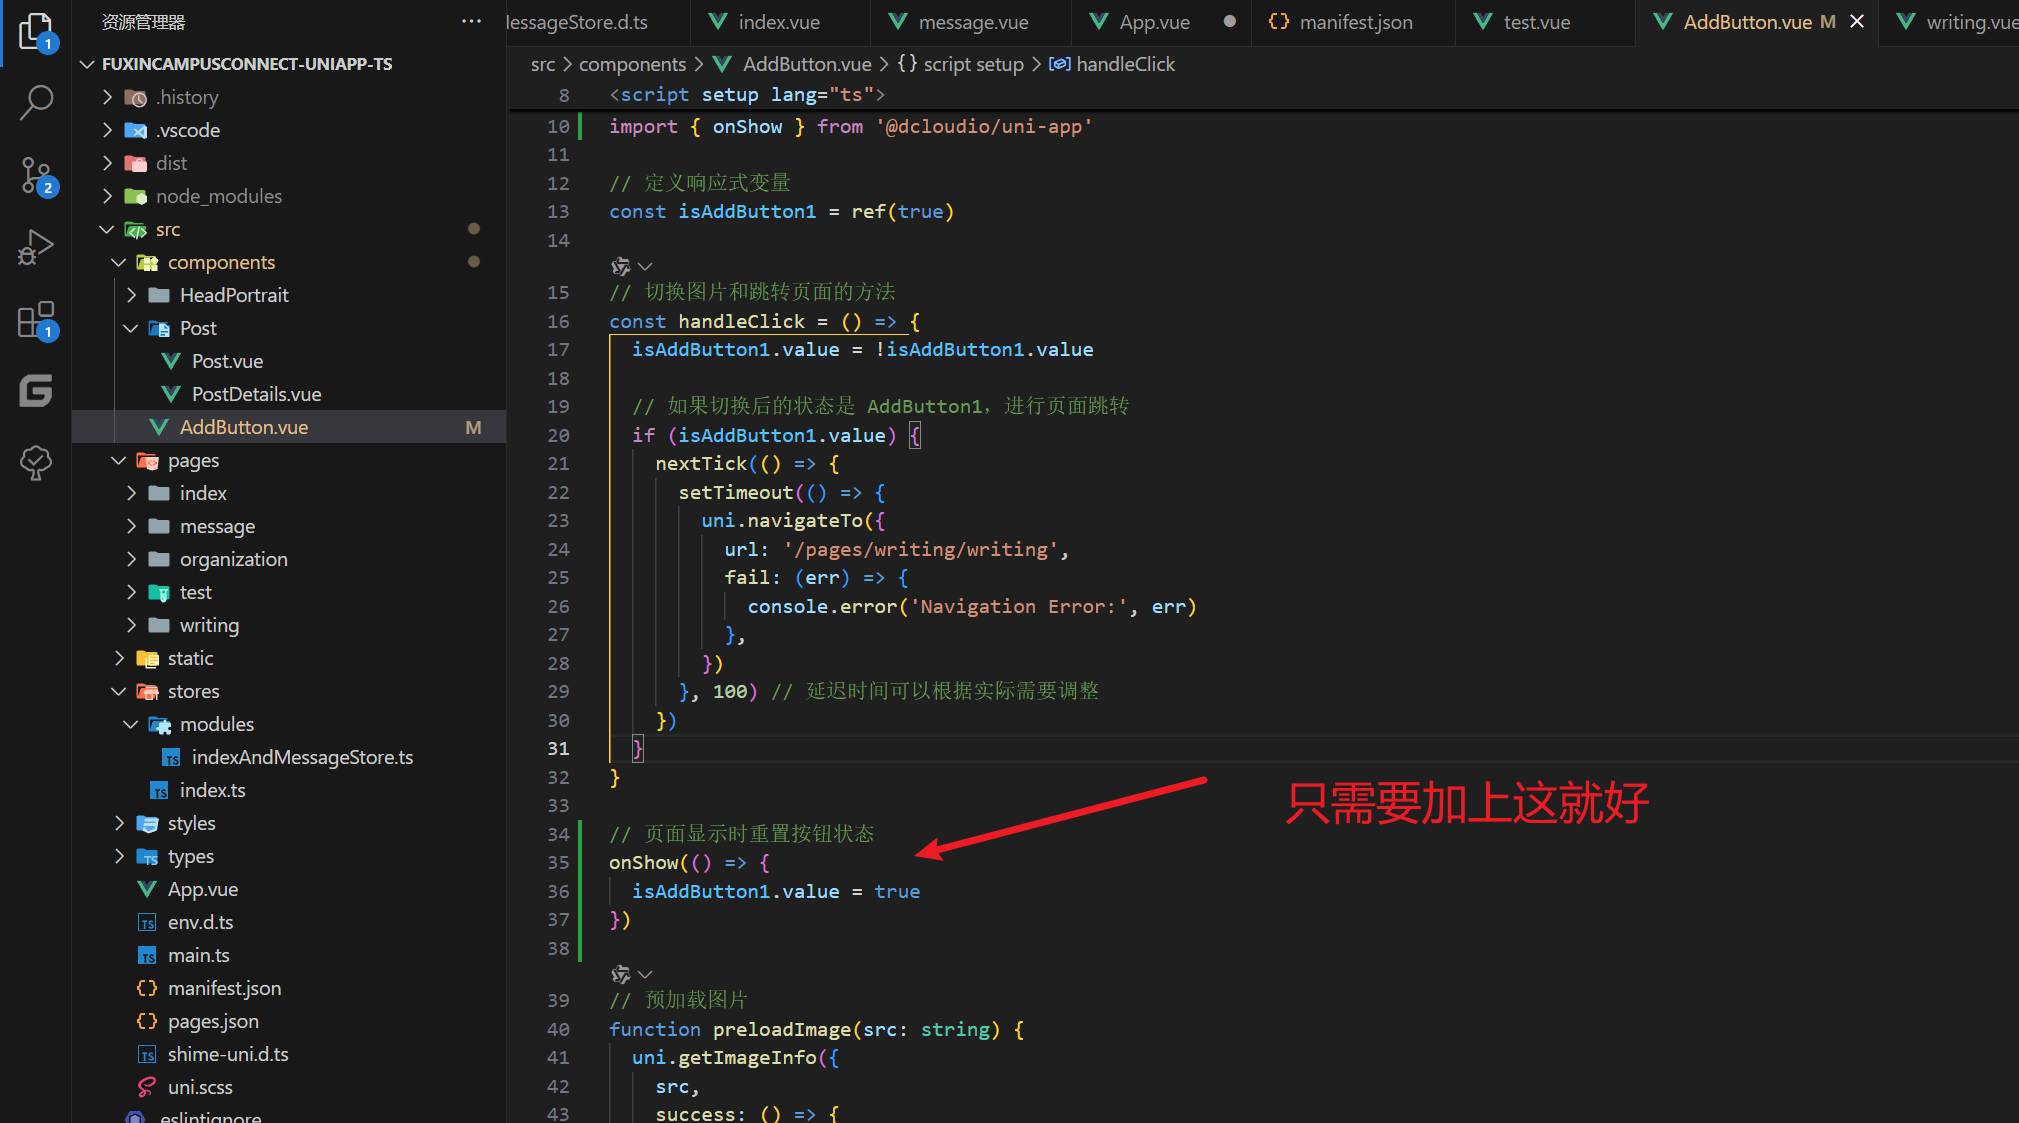
- 其实其他地方也是如此 只需要在onShow赋值为0,不过这里更多是是起教学作用,带大家认识到pinia进行状态管理,需要做什么。

你好,我是Qiuner. 为帮助别人少走弯路而写博客 这是我的 github https://github.com/Qiuner⭐ gitee https://gitee.com/Qiuner 🌹
如果本篇文章帮到了你 不妨点个赞吧~ 我会很高兴的 😄 (^ ~ ^) 。想看更多 那就点个关注吧 我会尽力带来有趣的内容 😎。
代码都在github或gitee上,如有需要可以去上面自行下载。记得给我点星星哦😍
如果你遇到了问题,自己没法解决,可以去我掘金评论区问。私信看不完,CSDN评论区可能会漏看 掘金账号 https://juejin.cn/user/1942157160101860 掘金账号
更多专栏:
📊 一图读懂系列
📝 一文读懂系列
⚽ Uniapp
🌟 持续更新
🤩 Vue项目实战
🚀 JavaWeb
🎨 设计模式
📡 计算机网络
🎯 人生经验
🔍 软件测试
掘金账号 CSDN账号
感谢订阅专栏 三连文章


