
基本概念
VUE 最大的特点就是组件化,理解组件化可视为积木模块,其特点就是增加了复用性。把一个个.vue文件就是组件(又作SFC),组件的组合就是一个功能页。
组成部分说明
<!--内容控制(必要)-->
<template></template>
<!--JS 控制(非必要)-->
<script></script>
<!-- 样式控制 (非必要)-->
<style></style>
示例创建一个简单的VUE模板示例
1.创建一个test.vue文件
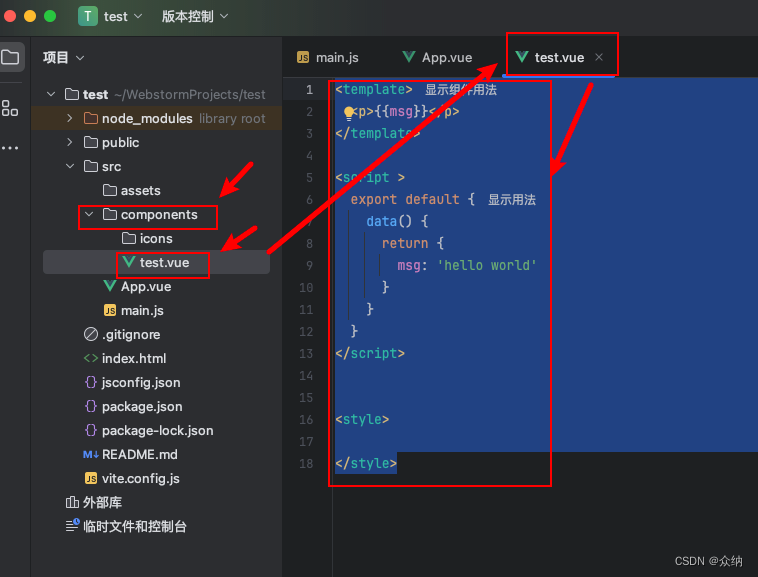
<template><p>{{msg}}</p>
</template><script >export default {data() {return {msg: 'hello world'}}}
</script>
2.在App.vue的JS中引用这个文件,并在template 调用这个组件

<!--内容控制-->
<template><test/>
</template>
<!--JS 控制-->
<script>
import test from "@/components/test.vue";
import {defineComponent} from "vue";
import Test from "@/components/test.vue";export default defineComponent({components: {Test}
})</script>
<!-- 样式控制 -->
<style>如果<style scoped> 则表示样式仅在当前页面生效
</style>
效果

实践:实现一个嵌套页面
目标
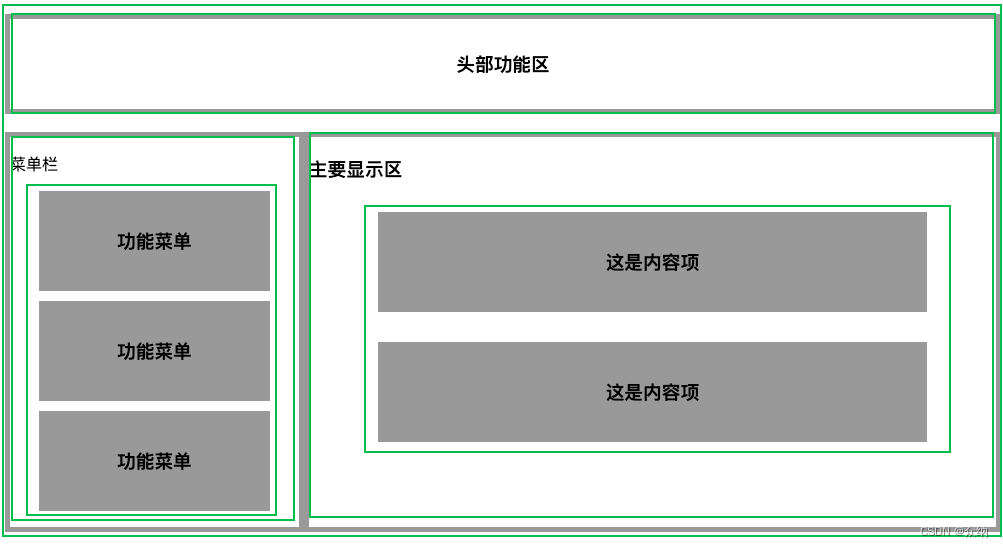
结构分析
ST1:分别创建二级容器(组件)
head.vue
<template><h3>头部功能区</h3>
</template><script setup></script><style scoped>h3{width: 100%;height: 100px;border: 5px solid #999;text-align: center;line-height: 90px;box-sizing: border-box;}
</style>
left.vue
<template><div class="right"><p>菜单栏</p></div>
</template><script></script><style scoped>
.right{float: left;width: 30%;height: 400px;border: 5px solid #999;box-sizing: border-box;
}
</style>
main.vue
<template><div class="main"><h3>主要显示区</h3></div></template><script></script><style scoped>.main{float: right;width: 70%;height: 400px;border: 5px solid #999;box-sizing: border-box;}
</style>
ST2:在一级容器中引用二级容器
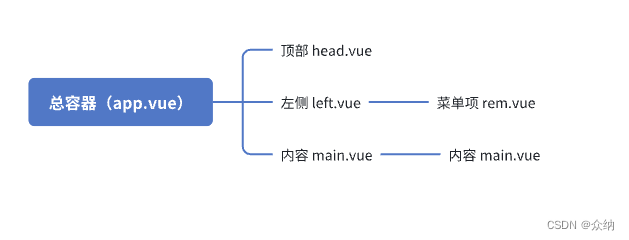
app.vue
<template><top/><Main></Main><left></left>
</template>
<!--JS 控制-->
<script>
import test from "@/components/test.vue";
import {defineComponent} from "vue";
import top from "@/components/head.vue";
import Main from "@/components/main.vue";
import left from "@/components/left.vue";export default defineComponent({components: {top, Main,Right,left}
})</script>
<!-- 样式控制 -->
<style></style>
ST3:分别创建三级容器
item.vue
<template><h3> 功能菜单 </h3>
</template><script setup></script><style scoped>h3{width: 80%;margin: 0 auto;text-align: center;line-height: 100px;box-sizing: border-box;margin-top: 10px;background: #999999;}
</style>
rem.vue
<template><h3>这是内容项</h3>
</template><script setup></script><style scoped>h3{width: 80%;margin: 0 auto;text-align: center;line-height: 100px;box-sizing: border-box;margin-top: 30px ;background: #999999;}
</style>
ST4:分别在二级容器中引用二级容器
left.vue
<template><div class="right"><p>菜单栏</p><Item></Item><Item></Item><Item></Item></div>
</template><script>
import {defineComponent} from "vue";
import Item from "@/components/item.vue";
export default defineComponent({components: {Item}
})</script><style scoped>
.right{float: left;width: 30%;height: 400px;border: 5px solid #999;box-sizing: border-box;
}
</style>
main.vue
<template><div class="main"><h3>主要显示区</h3><Rem></Rem><Rem></Rem></div></template><script>
import Rem from "@/components/rem.vue";
import {defineComponent} from "vue";export default defineComponent({components: {Rem}
})</script><style scoped>.main{float: right;width: 70%;height: 400px;border: 5px solid #999;box-sizing: border-box;}
</style>


:如何简单的理解VUE 组件,并手把手实现一个嵌套组件 "VUE3 学习笔记(7):如何简单的理解VUE 组件,并手把手实现一个嵌套组件")


