
系列文章目录
第一章 基础知识、数据类型学习
第二章 万年历项目
第三章 代码逻辑训练习题
第四章 方法、数组学习
第五章 图书管理系统项目
第六章 面向对象编程:封装、继承、多态学习
第七章 封装继承多态习题
第八章 常用类、包装类、异常处理机制学习
第九章 集合学习
第十章 IO流、多线程学习
第十一章 仓库管理系统JavaSE项目
第十二章 员工管理系统、多表查询、反射实现DBHelper学习
第十三章 DML、DDL、数据库对象学习
第十四章 网络编程、各种标签、CSS学习
第十五章 ECMAScript、BOM学习
第十六章 DOM、jQuery学习
第十七章 servlet、jsp、Cookie、Ajax学习
第十八章 融资管理系统JavaWeb项目
第十九章 MyBatis框架学习
第二十章 逆向工程、Spring框架IOC、AOP学习
第二十一章 SpringMVC框架学习
第二十二章 SpringBoot框架学习
第二十三章 招聘网站框架项目
第二十四章 Vue介绍、窗体内操作、窗体间操作学习
第二十六章 Vue路由配置、网络请求访问框架项目、element组件介绍学习
第二十五章 标准管理系统Vue项目
第二十六章 Linux安装、Nginx反向代理、负载均衡学习
第二十七章 Docker学习
第二十八章 Jenkins学习
第二十九章 Nexus学习
第三十章 Spring Security学习
第三十一章 RabbitMQ学习
文章目录
- 系列文章目录
- 前言
- 一、RabbitMQ介绍
- 1. MQ介绍
- 2. RabbitMQ介绍
- 3. RabbitMQ基本概念
- 3.1 Queues(队列)
- 3.2 Exchange(交换器)
- 3.2.1 常用的三种类型
- 3.3 Broker(消息服务器)
- 3.4 Connections & Channels(连接和信道)
- 3.5 虚拟主机
- 二、RabbitMQ安装
- 1. RabbitMQ安装
- 三、SpringBoot整合
- 1. 创建Maven项目
- 2. 添加如下依赖
- 3. 在启动类上添加注解,开启RabbitMQ
- 4. application.yml配置文件
- 5. 创建新的用户
- 6. 创建交换机
- 6.1 创建com.jjy.test包,在包下创建交换机
- 6.2 createExchange方法下,创建新的方法
- 6.3 创建绑定
- 7. 发送消息
- 7.1 发送字符串
- 7.2 发送对象
- 7.2.1 创建配置类
- 7.2.2 创建对象类
- 7.2.3 发送消息
- 8. @RabbitListener接收信息
- 8.1 创建RabbitMqListener类
- 总结
前言
本文我们要讲述:
RabbitMQ
在下攸攸太上,我很担心现在头发很少的问题,呜呜!各位博友都是程序员,有没有增加发量的好方法啊?
一、RabbitMQ介绍
1. MQ介绍
MQ(消息队列)是一种基于消息的解耦和异步通信模式。它允许应用程序之间通过发送和接收消息来进行通信,而不需要直接的点对点连接。MQ提供了一种可靠、可扩展和可靠地传输消息的方式,使得不同的应用程序可以独立地进行工作,而无需实时的交互。
MQ的作用:解耦合、异步通信、削峰填谷、数据传输保证、系统扩展性
2. RabbitMQ介绍
RabbitMQ是一个开源的消息队列中间件,实现了高级消息队列协议(AMQP)。它提供了一个可靠的、强大的、灵活的消息传输机制,以及可用于构建分布式系统的可靠通信机制。
RabbitMQ的工作原理是通过消息代理(Message Broker)来中转和存储消息。应用程序可以将消息发布到RabbitMQ的交换机(Exchange),然后由RabbitMQ将消息路由到相应的队列(Queue),消费者应用程序从队列中订阅并处理消息。
RabbitMQ支持多种消息传递模式,包括点对点(Point-to-Point)和发布/订阅(Publish/Subscribe)等。它具有高度的可靠性和可扩展性,可以处理大量的消息,并提供了可靠的消息传输机制,如消息确认、持久化和消息重试等。
3. RabbitMQ基本概念
3.1 Queues(队列)
队列用于存储消息。它是一种点对点消息传递模式,其中一个生产者将消息发送到队列,然后一个消费者从队列中接收并处理消息。
3.2 Exchange(交换器)
交换器类似于路由器,它将消息路由到一个或多个队列。交换器根据消息的路由键将消息发送到相应的队列。
3.2.1 常用的三种类型
Direct(直连):根据路由键将消息路由到特定队列,需要精确匹配。
Fanout(扇形):将消息广播到绑定到交换器的所有队列,不需要路由键。
Topic(主题):根据通配符模式匹配路由键将消息路由到队列。
3.3 Broker(消息服务器)
Broker是消息服务器,负责接收和传递消息。在RabbitMQ中,可以设置多个Broker来实现分布式架构。
3.4 Connections & Channels(连接和信道)
为了发送消息到队列,需要建立连接。连接是从应用程序到RabbitMQ的通信通道。通过信道可以找到交换器和队列。
3.5 虚拟主机
虚拟主机是RabbitMQ中的逻辑分区,用于隔离和管理多个项目之间的消息。每个虚拟主机都是一个独立的环境,不会相互干扰。
二、RabbitMQ安装
1. RabbitMQ安装
docker run -d --name rabbitmq -p 5671:5671 -p 5672:5672 -p 4369:4369 -p 25672:25672 -p 15671:15671 -p 15672:15672 rabbitmq:3.9.9-management
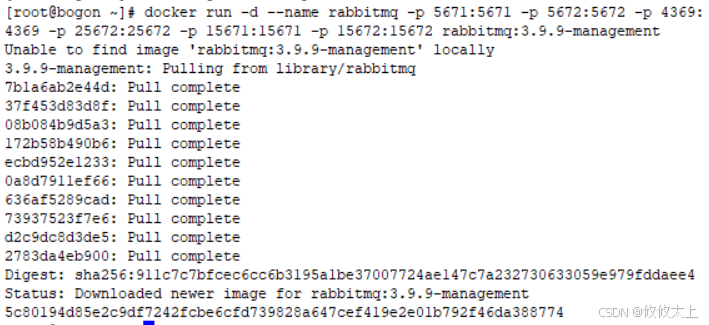
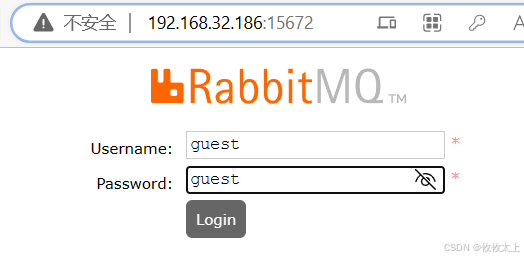
通过http://192.168.32.186:15672访问RabbitMQ,用户名和密码都是guest
三、SpringBoot整合
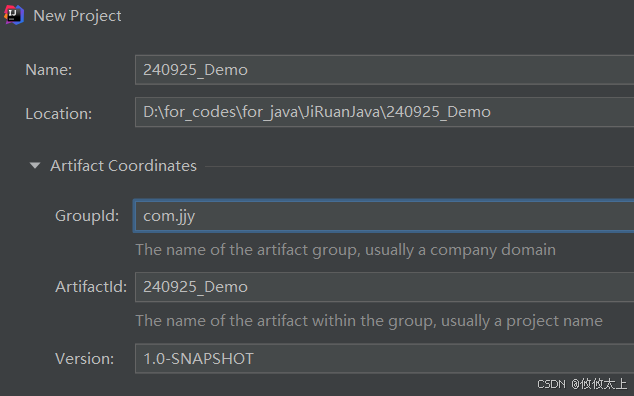
1. 创建Maven项目
2. 添加如下依赖
<dependencies><dependency><groupId>org.springframework.boot</groupId><artifactId>spring-boot-starter-amqp</artifactId></dependency><dependency><groupId>org.springframework.boot</groupId><artifactId>spring-boot-starter-test</artifactId><scope>compile</scope></dependency><!-- <!– 1.依赖方式:添加SpringBoot启动器 –><dependency><groupId>org.springframework.boot</groupId><artifactId>spring-boot-dependencies</artifactId><version>2.1.10.RELEASE</version><type>pom</type><scope>import</scope></dependency>--><!-- 2.添加SpringMVC启动器依赖 --><dependency><groupId>org.springframework.boot</groupId><artifactId>spring-boot-starter-web</artifactId><version>2.1.10.RELEASE</version></dependency><dependency><groupId>org.projectlombok</groupId><artifactId>lombok</artifactId></dependency><dependency><groupId>org.junit.jupiter</groupId><artifactId>junit-jupiter</artifactId><version>RELEASE</version><scope>compile</scope></dependency><dependency><groupId>org.junit.jupiter</groupId><artifactId>junit-jupiter</artifactId><version>RELEASE</version><scope>compile</scope></dependency></dependencies><parent><groupId>org.springframework.boot</groupId><artifactId>spring-boot-starter-parent</artifactId><version>2.1.10.RELEASE</version></parent><!--2.添加当前项目所依赖的插件: --><build><plugins><!--1.添加tomcat插件 --><plugin><groupId>org.apache.tomcat.maven</groupId><artifactId>tomcat7-maven-plugin</artifactId><version>2.2</version><configuration><port>8080</port><path>/</path></configuration></plugin><!-- <plugin><groupId>org.sonarsource.scanner.maven</groupId><artifactId>sonar-maven-plugin</artifactId><version>3.9.0.2155</version> <!– 根据需要的Sonar版本进行选择 –></plugin>--><!--2.添加Spring Boot 的打包插件 --><plugin><groupId>org.springframework.boot</groupId><artifactId>spring-boot-maven-plugin</artifactId><version>2.1.10.RELEASE</version><configuration><fork>true</fork></configuration></plugin><plugin><groupId>org.apache.maven.plugins</groupId><artifactId>maven-compiler-plugin</artifactId><version>3.6.0</version><configuration><source>1.8</source><target>1.8</target></configuration></plugin><plugin><groupId>org.apache.maven.plugins</groupId><artifactId>maven-source-plugin</artifactId><version>3.0.0</version><configuration><attach>true</attach></configuration><executions><execution><phase>compile</phase><goals><goal>jar</goal></goals></execution></executions></plugin></plugins></build>
3. 在启动类上添加注解,开启RabbitMQ
@EnableRabbit
package com;import org.springframework.amqp.rabbit.annotation.EnableRabbit;import org.springframework.boot.SpringApplication;import org.springframework.boot.autoconfigure.SpringBootApplication;@SpringBootApplication
@EnableRabbit
public class SpringBootMain {public static void main(String[] args) {SpringApplication.run(SpringBootMain.class, args);}
}
4. application.yml配置文件
spring:rabbitmq:host: 192.168.32.186port: 5672username: guestpassword: guest
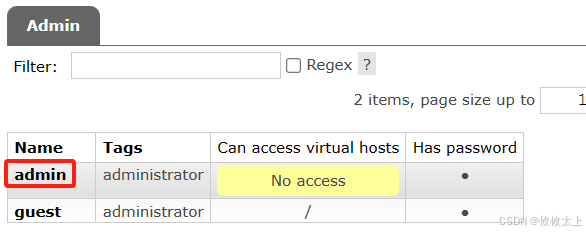
5. 创建新的用户
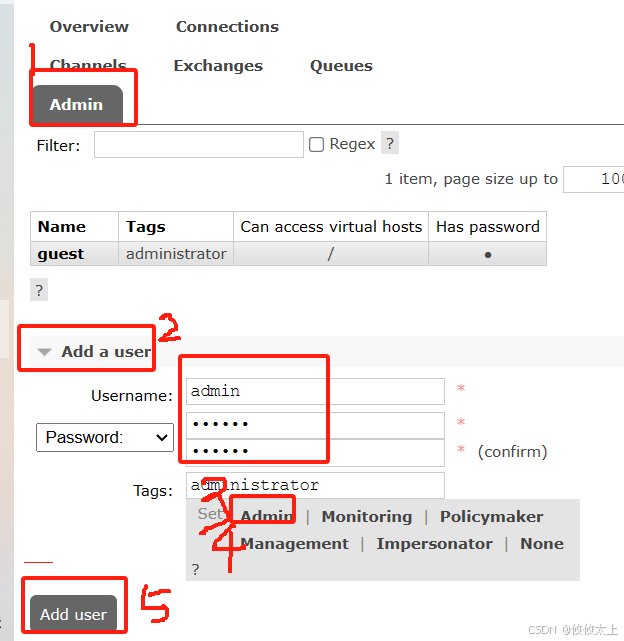
添加成功后,点击admin进入admin详情中
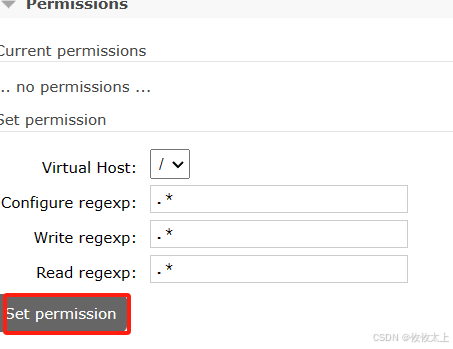
点击设置用户的虚拟主机,/表示全部
6. 创建交换机
6.1 创建com.jjy.test包,在包下创建交换机
package com.jjy.test;import com.SpringBootMain;
import lombok.extern.slf4j.Slf4j;
import org.junit.Test;
import org.junit.runner.RunWith;
import org.springframework.amqp.core.AmqpAdmin;
import org.springframework.amqp.core.DirectExchange;
import org.springframework.beans.factory.annotation.Autowired;
import org.springframework.boot.test.context.SpringBootTest;
import org.springframework.test.context.junit4.SpringRunner;//SpringBootMain 是SpringBoot项目的启动类
@SpringBootTest(classes = SpringBootMain.class)
@Slf4j@SuppressWarnings("all")
@RunWith(SpringRunner.class) //SpringRunner 是依赖中的系统类,如果Test导的是junit包里,需要加@RunWith注解
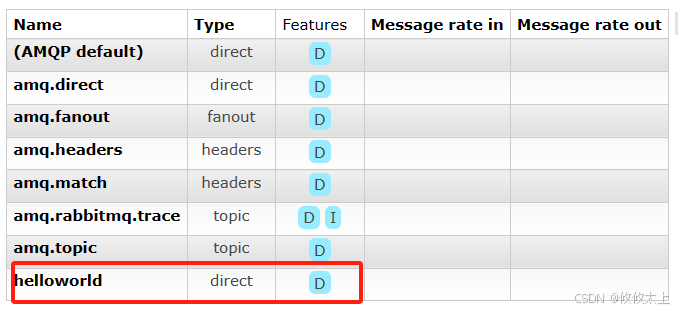
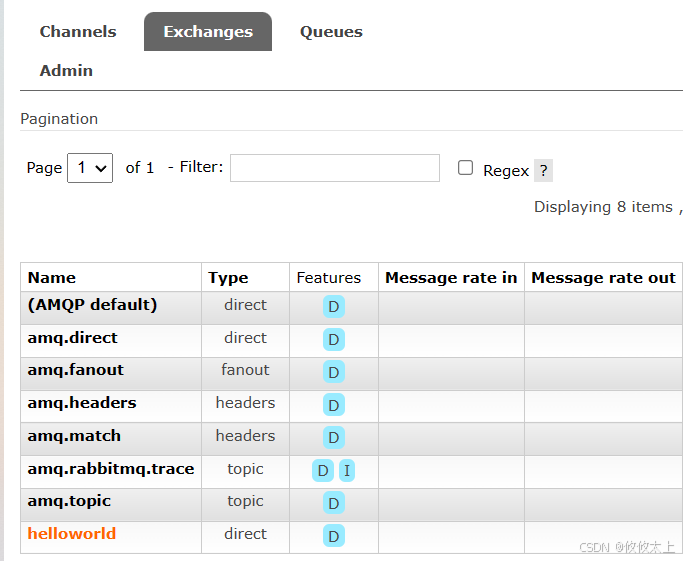
public class RabbitMqTest {@Autowiredprivate AmqpAdmin amqpAdmin;/*** String name:交换机名称* boolean durable:是否持久化* boolean autoDelete:是否自动删除*/@Testpublic void createExchange() {String name = "helloworld";boolean durable = true;boolean autoDelete = false;DirectExchange directExchange = new DirectExchange(name, durable, autoDelete);amqpAdmin.declareExchange(directExchange);log.info("create exchanges {}", "hello");}
}
我们运行RabbitMqTest

6.2 createExchange方法下,创建新的方法
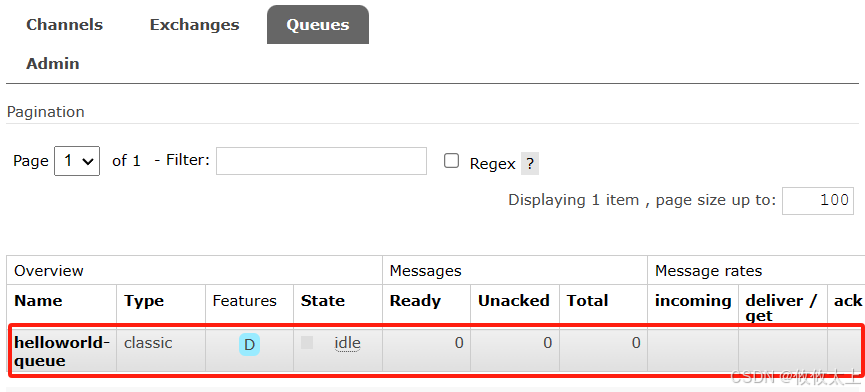
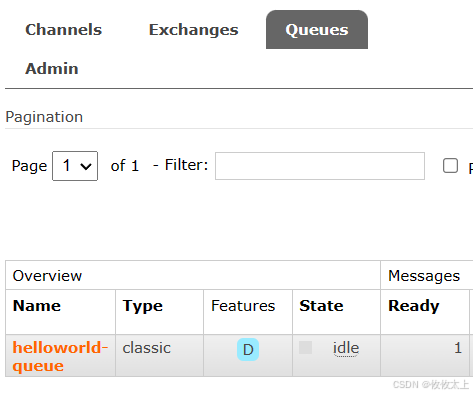
/*** 队列名称* 是否持久化* 是否排他* 是否自动删除*/@Testpublic void createQueue() {Queue queue = new Queue("helloworld-queue", true, false, false);String queueName = amqpAdmin.declareQueue(queue);log.info("create queue {}", queueName);}
然后运行,在Queus能看到helloworld-queue
6.3 创建绑定
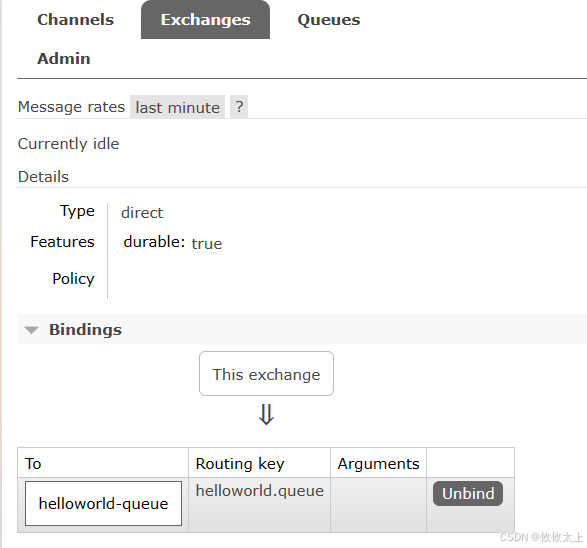
/*** 目的地名字(就是队列的名字)* 绑定类型,交换机或队列* 交换机名称* 路由键* 参数(很少使用)*/@Testpublic void createBinding() {Binding binding = new Binding("helloworld-queue", Binding.DestinationType.QUEUE, "helloworld", "helloworld.queue", null);amqpAdmin.declareBinding(binding);log.info("create binding routeKey {}", "helloworld.queue");}然后运行,在Exchanges下点击helloworld,弹出页面后点击Bingings会出现helloworld.queue
7. 发送消息
7.1 发送字符串
继续将代码添加到RabbitMqTest下
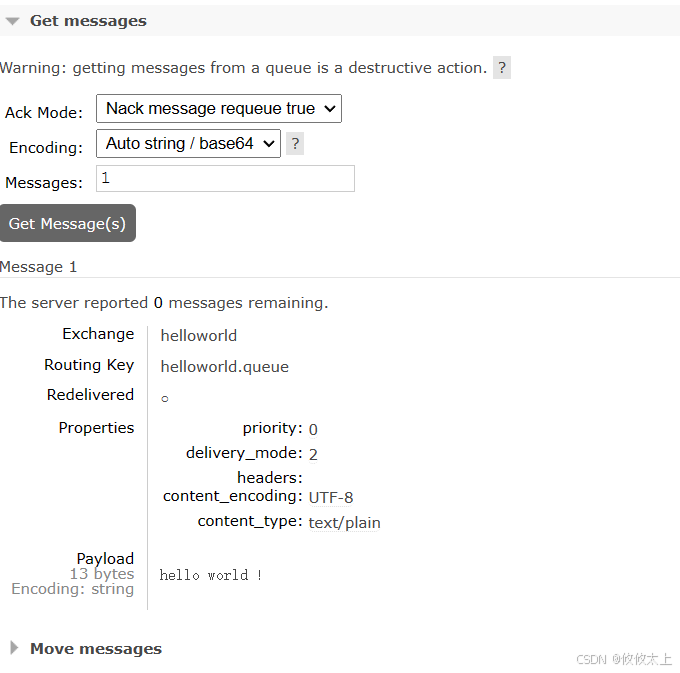
@Autowiredprivate RabbitTemplate rabbitTemplate; /*** 交换机名称* 路由键* 内容*/@Testpublic void sendMessage(){rabbitTemplate.convertAndSend("helloworld", "helloworld.queue", "hello world !");}
点击运行,Queue内点击helloworld-queue
点击Get messages后点击Get Messages,得到Payload:hello world!
7.2 发送对象
7.2.1 创建配置类
在com.jjy.config包下创建配置类
package com.jjy.config;import org.springframework.amqp.support.converter.Jackson2JsonMessageConverter;
import org.springframework.amqp.support.converter.MessageConverter;
import org.springframework.context.annotation.Bean;
import org.springframework.context.annotation.Configuration;@Configuration
public class MyMqConfig {@Beanpublic MessageConverter messageConverter() {return new Jackson2JsonMessageConverter();}}
7.2.2 创建对象类
在com.jjy.entry包下创建对象类
package com.jjy.entry;import lombok.AllArgsConstructor;
import lombok.Data;
import lombok.NoArgsConstructor;
import lombok.ToString;@Data
@AllArgsConstructor
@NoArgsConstructor
@ToString
public class User {private String name;private String password;
}
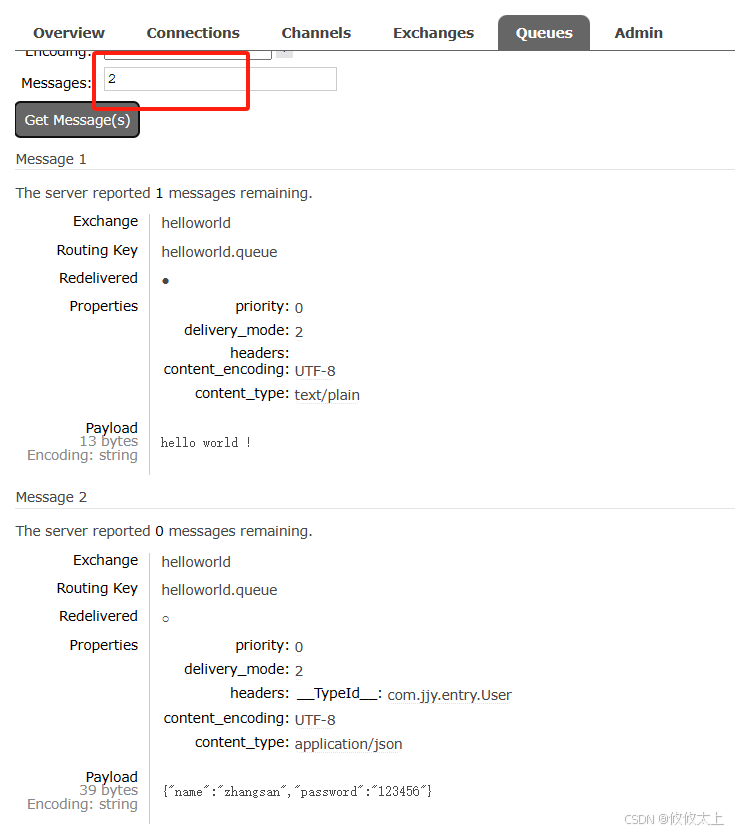
7.2.3 发送消息
/*** 交换机名称* 路由键* 对象*/@Testpublic void sendObject(){User user = new User();user.setName("zhangsan");user.setPassword("123456");rabbitTemplate.convertAndSend("helloworld", "helloworld.queue", user);}
点击运行,在Messages下写2,我们可以获得两条信息
8. @RabbitListener接收信息
8.1 创建RabbitMqListener类
package com.jjy;import com.jjy.entry.User;
import org.springframework.amqp.core.Message;
import org.springframework.amqp.rabbit.annotation.RabbitListener;
import org.springframework.stereotype.Component;@Component
public class RabbitMqListener {@RabbitListener(queues = {"helloworld-queue"})public void getMessage(Message message, User user) {System.out.println("--------------------------------------------------");System.out.println("--------------------------------------------------");System.out.println("--------------------------------------------------");System.out.println("--------------------------------------------------");System.out.println("--------------------------------------------------");System.out.println("--------------------------------------------------");System.out.println(user);System.out.println("--------------------------------------------------");System.out.println(message);System.out.println("--------------------------------------------------");System.out.println(new String(message.getBody()));System.out.println("--------------------------------------------------");System.out.println("--------------------------------------------------");System.out.println("--------------------------------------------------");System.out.println("--------------------------------------------------");System.out.println("--------------------------------------------------");System.out.println("--------------------------------------------------");}
}
再次运行sendObject()方法
控制台会输出相应信息

总结
本文讲述了:
RabbitMQ:消息队列,用于不同项目间值的传递
在下攸攸太上,梦想成为CSDN榜1的男人。


