C# WPF入门学习主线篇(三十三)—— 使用ICommand实现命令绑定

在MVVM模式中,命令绑定是将用户交互(如按钮点击)与ViewModel中的方法连接起来的一种机制。使用ICommand接口可以实现这一功能,从而将UI逻辑与业务逻辑分离。本文将详细介绍如何使用ICommand实现命令绑定,并通过一个示例来演示具体的实现步骤。
一、ICommand接口概述
ICommand接口定义了执行命令的基本方法和事件,包括:
Execute(object parameter): 定义命令执行的逻辑。CanExecute(object parameter): 确定命令是否可以执行。CanExecuteChanged: 当命令的执行状态发生变化时触发的事件。
通过实现ICommand接口,可以将用户的操作与ViewModel中的命令进行绑定。
二、创建RelayCommand类
为了简化ICommand的实现,我们可以创建一个通用的RelayCommand类。这个类将实现ICommand接口,并封装命令的执行逻辑和执行条件。
using System;
using System.Windows.Input;public class RelayCommand : ICommand
{private readonly Action<object> _execute;private readonly Func<object, bool> _canExecute;public RelayCommand(Action<object> execute, Func<object, bool> canExecute = null){_execute = execute;_canExecute = canExecute;}public bool CanExecute(object parameter){return _canExecute == null || _canExecute(parameter);}public void Execute(object parameter){_execute(parameter);}public event EventHandler CanExecuteChanged{add { CommandManager.RequerySuggested += value; }remove { CommandManager.RequerySuggested -= value; }}
}
三、在ViewModel中使用RelayCommand
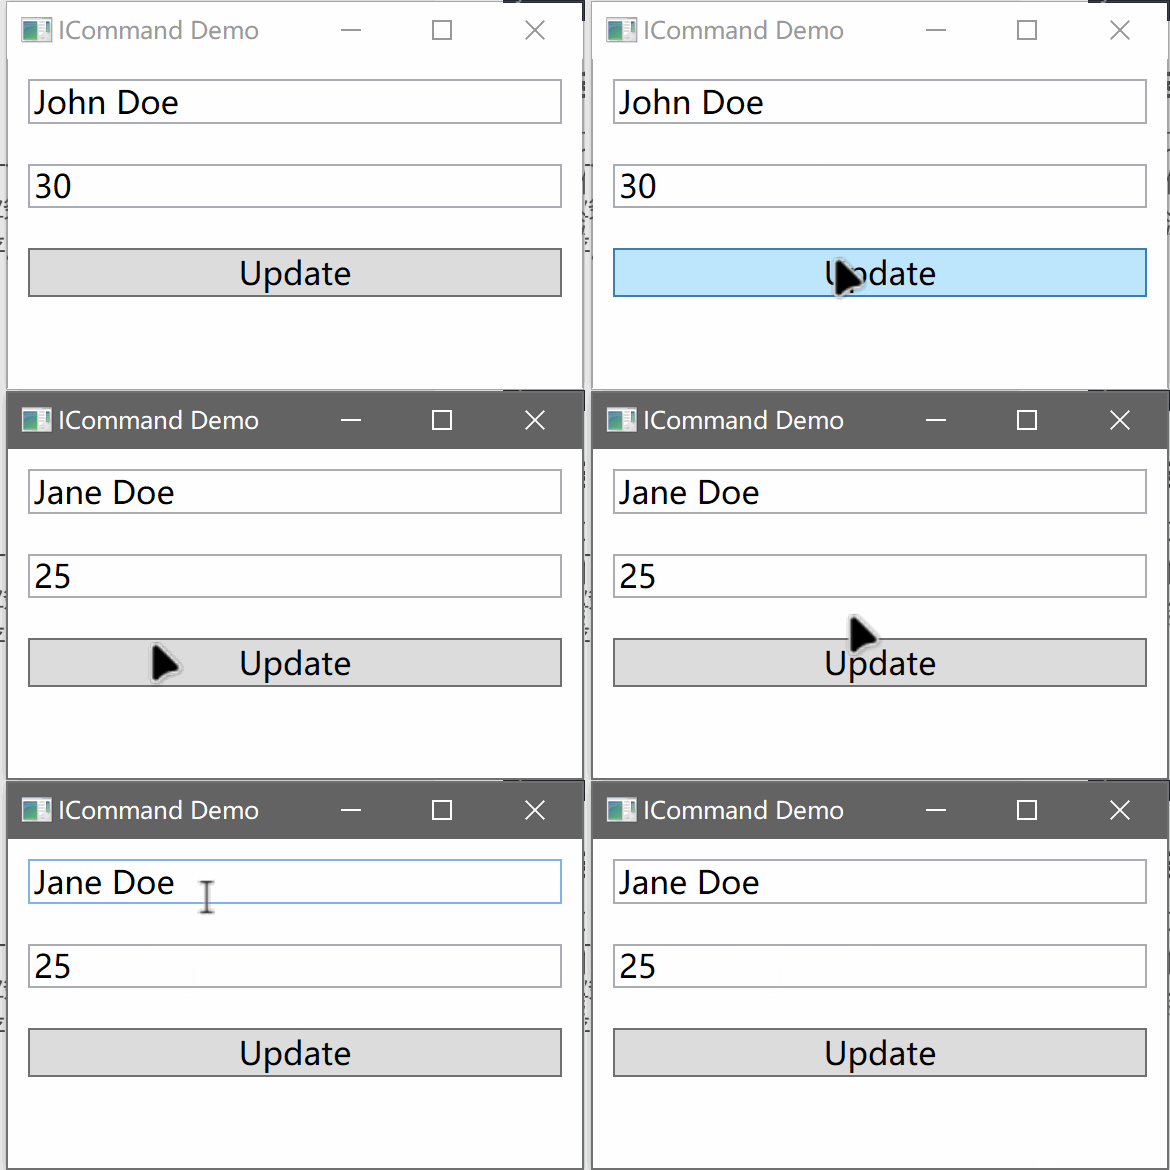
接下来,我们在ViewModel中定义命令并绑定到UI。在这个示例中,我们将实现一个简单的应用程序,其中包含一个按钮,点击按钮后更新文本框的内容。
1. 创建Model
首先,定义一个简单的Model类:
public class Person
{public string Name { get; set; }public int Age { get; set; }
}
2. 创建ViewModel
接下来,创建ViewModel类,定义命令并绑定Model的数据:
using System.ComponentModel;
using System.Windows.Input;public class PersonViewModel : INotifyPropertyChanged
{private Person _person;public PersonViewModel(){_person = new Person { Name = "John Doe", Age = 30 };UpdateCommand = new RelayCommand(UpdatePerson);}public string Name{get { return _person.Name; }set{if (_person.Name != value){_person.Name = value;OnPropertyChanged(nameof(Name));}}}public int Age{get { return _person.Age; }set{if (_person.Age != value){_person.Age = value;OnPropertyChanged(nameof(Age));}}}public ICommand UpdateCommand { get; }private void UpdatePerson(object parameter){Name = "Jane Doe";Age = 25;}public event PropertyChangedEventHandler PropertyChanged;protected void OnPropertyChanged(string propertyName){PropertyChanged?.Invoke(this, new PropertyChangedEventArgs(propertyName));}
}
3. 创建View
在View(XAML文件)中,绑定命令和数据上下文:
<Window x:Class="WpfApp.MainWindow"xmlns="http://schemas.microsoft.com/winfx/2006/xaml/presentation"xmlns:x="http://schemas.microsoft.com/winfx/2006/xaml"xmlns:local="clr-namespace:WpfApp"Title="ICommand Demo" Height="200" Width="300"><Grid><StackPanel><TextBox Text="{Binding Name, UpdateSourceTrigger=PropertyChanged}" FontSize="16" Margin="10"/><TextBox Text="{Binding Age, UpdateSourceTrigger=PropertyChanged}" FontSize="16" Margin="10"/><Button Content="Update" Command="{Binding UpdateCommand}" FontSize="16" Margin="10"/></StackPanel></Grid>
</Window>
4. 设置DataContext
在代码隐藏文件中,将ViewModel实例绑定到View的DataContext:
using System.Windows;namespace WpfApp
{public partial class MainWindow : Window{public MainWindow(){InitializeComponent();this.DataContext = new PersonViewModel();}}
}
四、完整代码示例
MainWindow.xaml
<Window x:Class="WpfApp.MainWindow"xmlns="http://schemas.microsoft.com/winfx/2006/xaml/presentation"xmlns:x="http://schemas.microsoft.com/winfx/2006/xaml"xmlns:local="clr-namespace:WpfApp"Title="ICommand Demo" Height="200" Width="300"><Grid><StackPanel><TextBox Text="{Binding Name, UpdateSourceTrigger=PropertyChanged}" FontSize="16" Margin="10"/><TextBox Text="{Binding Age, UpdateSourceTrigger=PropertyChanged}" FontSize="16" Margin="10"/><Button Content="Update" Command="{Binding UpdateCommand}" FontSize="16" Margin="10"/></StackPanel></Grid>
</Window>
MainWindow.xaml.cs
using System.Windows;namespace WpfApp
{public partial class MainWindow : Window{public MainWindow(){InitializeComponent();this.DataContext = new PersonViewModel();}}
}
Person.cs
public class Person
{public string Name { get; set; }public int Age { get; set; }
}
PersonViewModel.cs
using System.ComponentModel;
using System.Windows.Input;public class PersonViewModel : INotifyPropertyChanged
{private Person _person;public PersonViewModel(){_person = new Person { Name = "John Doe", Age = 30 };UpdateCommand = new RelayCommand(UpdatePerson);}public string Name{get { return _person.Name; }set{if (_person.Name != value){_person.Name = value;OnPropertyChanged(nameof(Name));}}}public int Age{get { return _person.Age; }set{if (_person.Age != value){_person.Age = value;OnPropertyChanged(nameof(Age));}}}public ICommand UpdateCommand { get; }private void UpdatePerson(object parameter){Name = "Jane Doe";Age = 25;}public event PropertyChangedEventHandler PropertyChanged;protected void OnPropertyChanged(string propertyName){PropertyChanged?.Invoke(this, new PropertyChangedEventArgs(propertyName));}
}
RelayCommand.cs
using System;
using System.Windows.Input;public class RelayCommand : ICommand
{private readonly Action<object> _execute;private readonly Func<object, bool> _canExecute;public RelayCommand(Action<object> execute, Func<object, bool> canExecute = null){_execute = execute;_canExecute = canExecute;}public bool CanExecute(object parameter){return _canExecute == null || _canExecute(parameter);}public void Execute(object parameter){_execute(parameter);}public event EventHandler CanExecuteChanged{add { CommandManager.RequerySuggested += value; }remove { CommandManager.RequerySuggested -= value; }}
}

五、总结
通过本文,我们详细介绍了如何在WPF应用程序中使用ICommand实现命令绑定,并通过一个具体的示例演示了如何实现命令绑定。使用命令绑定可以将用户交互与ViewModel中的命令连接起来,从而实现UI逻辑与业务逻辑的分离,提高代码的可维护性和可测试性。希望本文能帮助你更好地理解和应用ICommand接口,提高WPF开发的水平。


—— 使用ICommand实现命令绑定)