
一、本文介绍
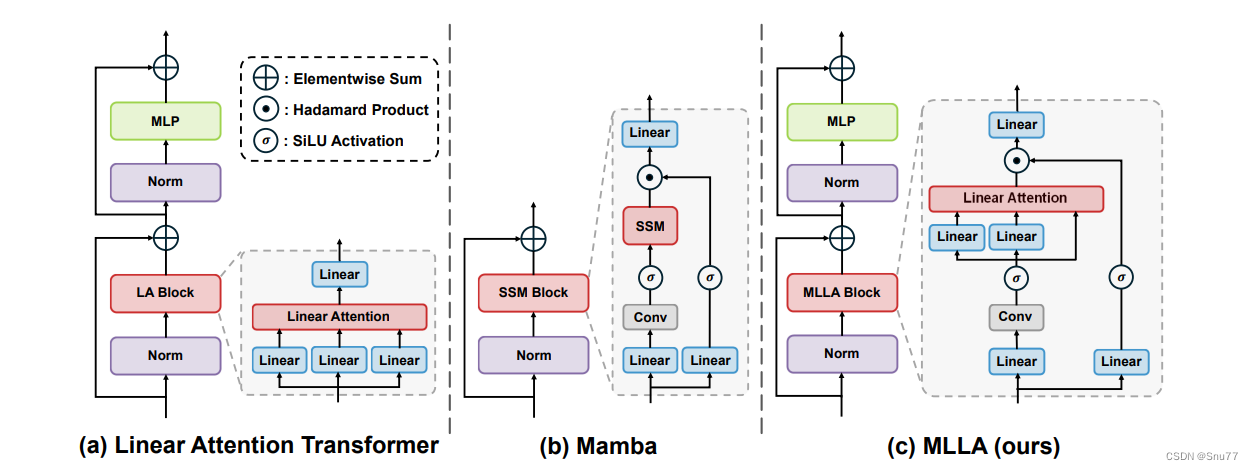
本文给大家带来的改进机制是结合号称超越Transformer架构的Mamba架构的最新注意力机制MLLA,本文将其和我们YOLOv8进行结合,MLLA(Mamba-Like Linear Attention)的原理是通过将Mamba模型的一些核心设计融入线性注意力机制,从而提升模型的性能。具体来说,MLLA主要整合了Mamba中的“忘记门”(forget gate)和模块设计(block design)这两个关键因素,同时MLLA通过使用位置编码(RoPE)来替代忘记门,从而在保持并行计算和快速推理速度的同时,提供必要的位置信息。这使得MLLA在处理非自回归的视觉任务时更加有效 ,本文内容为我独家整理全网首发。
专栏目录:YOLOv8改进有效系列目录 | 包含卷积、主干、检测头、注意力机制、Neck上百种创新机制
目录
一、本文介绍
二、原理介绍
三、核心代码
四、手把手教你添加MLLA
4.1 修改一
4.2 修改二
4.3 修改三
4.4 修改四
五、MLLA的yaml文件和运行记录
5.1 MLLA的yaml文件1
5.2 MLLA的yaml文件2
5.3 MLLA的yaml文件3
5.4 训练代码
5.5MLLA的训练过程截图
五、本文总结
二、原理介绍
官方论文地址:官方论文地址点击此处即可跳转
官方代码地址:官方代码地址点击此处即可跳转
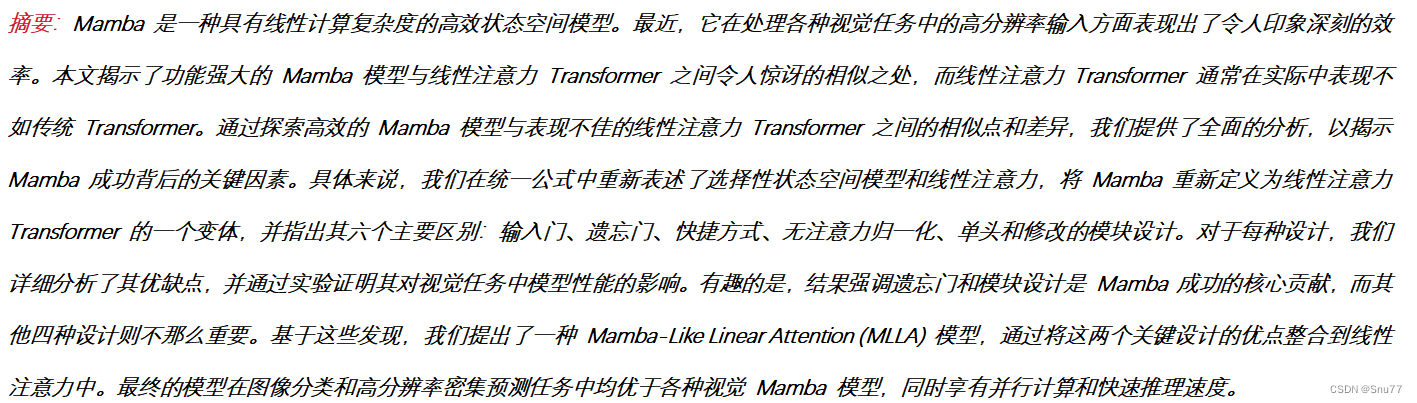
在这篇论文中,MLLA(Mamba-Like Linear Attention)的原理是通过将Mamba模型的一些核心设计融入线性注意力机制,从而提升模型的性能。具体来说,MLLA主要整合了Mamba中的“忘记门”(forget gate)和模块设计(block design)这两个关键因素,这些因素被认为是Mamba成功的主要原因。
以下是对MLLA原理的详细分析:
-
忘记门(Forget Gate):
- 忘记门提供了局部偏差和位置信息。所有的忘记门元素严格限制在0到1之间,这意味着模型在接收到当前输入后会持续衰减先前的隐藏状态。这种特性确保了模型对输入序列的顺序敏感。
- 忘记门的局部偏差和位置信息对于图像处理任务来说非常重要,尽管引入忘记门会导致计算需要采用递归的形式,从而降低并行计算的效率 。
-
模块设计(Block Design):
- Mamba的模块设计在保持相似的浮点运算次数(FLOPs)的同时,通过替换注意力子模块为线性注意力来提升性能。结果表明,采用这种模块设计能够显著提高模型的表现 。
-
线性注意力的改进:
- 线性注意力被重新设计以整合忘记门和模块设计,这种改进后的模型被称为MLLA。实验结果显示,MLLA在图像分类和高分辨率密集预测任务中均优于各种视觉Mamba模型 。
-
并行计算和快速推理速度:
- MLLA通过使用位置编码(RoPE)来替代忘记门,从而在保持并行计算和快速推理速度的同时,提供必要的位置信息。这使得MLLA在处理非自回归的视觉任务时更加有效 。
通过这些改进,MLLA不仅继承了Mamba模型的优点,还解决了其在并行计算中的一些局限性,使其更适合于视觉任务。MLLA展示了通过合理设计,线性注意力机制也能够超越传统的高性能模型。
三、核心代码
其中包含了上面提到的Rope,但是这个模块是经过我重新设计的,因为原先的代码需要输入图片的宽和高再定义时,但是经过重新设计后改为实时计算,有兴趣的可以和开源代码对比下!
# --------------------------------------------------------
# Swin Transformer
# Copyright (c) 2021 Microsoft
# Licensed under The MIT License [see LICENSE for details]
# Written by Ze Liu
# --------------------------------------------------------
# Demystify Mamba in Vision: A Linear Attention Perspective
# Modified by Dongchen Han
# -----------------------------------------------------------------------import torch
import torch.nn as nn__all__ = ['MLLAttention']class Mlp(nn.Module):def __init__(self, in_features, hidden_features=None, out_features=None, act_layer=nn.GELU, drop=0.):super().__init__()out_features = out_features or in_featureshidden_features = hidden_features or in_featuresself.fc1 = nn.Linear(in_features, hidden_features)self.act = act_layer()self.fc2 = nn.Linear(hidden_features, out_features)self.drop = nn.Dropout(drop)def forward(self, x):x = self.fc1(x)x = self.act(x)x = self.drop(x)x = self.fc2(x)x = self.drop(x)return xclass ConvLayer(nn.Module):def __init__(self, in_channels, out_channels, kernel_size=3, stride=1, padding=0, dilation=1, groups=1,bias=True, dropout=0, norm=nn.BatchNorm2d, act_func=nn.ReLU):super(ConvLayer, self).__init__()self.dropout = nn.Dropout2d(dropout, inplace=False) if dropout > 0 else Noneself.conv = nn.Conv2d(in_channels,out_channels,kernel_size=(kernel_size, kernel_size),stride=(stride, stride),padding=(padding, padding),dilation=(dilation, dilation),groups=groups,bias=bias,)self.norm = norm(num_features=out_channels) if norm else Noneself.act = act_func() if act_func else Nonedef forward(self, x: torch.Tensor) -> torch.Tensor:if self.dropout is not None:x = self.dropout(x)x = self.conv(x)if self.norm:x = self.norm(x)if self.act:x = self.act(x)return xclass RoPE(torch.nn.Module):r"""Rotary Positional Embedding."""def __init__(self, base=10000):super(RoPE, self).__init__()self.base = basedef generate_rotations(self, x):# 获取输入张量的形状*channel_dims, feature_dim = x.shape[1:-1][0], x.shape[-1]k_max = feature_dim // (2 * len(channel_dims))assert feature_dim % k_max == 0, "Feature dimension must be divisible by 2 * k_max"# 生成角度theta_ks = 1 / (self.base ** (torch.arange(k_max, dtype=x.dtype, device=x.device) / k_max))angles = torch.cat([t.unsqueeze(-1) * theta_ks for t intorch.meshgrid([torch.arange(d, dtype=x.dtype, device=x.device) for d in channel_dims],indexing='ij')], dim=-1)# 计算旋转矩阵的实部和虚部rotations_re = torch.cos(angles).unsqueeze(dim=-1)rotations_im = torch.sin(angles).unsqueeze(dim=-1)rotations = torch.cat([rotations_re, rotations_im], dim=-1)return rotationsdef forward(self, x):# 生成旋转矩阵rotations = self.generate_rotations(x)# 将 x 转换为复数形式x_complex = torch.view_as_complex(x.reshape(*x.shape[:-1], -1, 2))# 应用旋转矩阵pe_x = torch.view_as_complex(rotations) * x_complex# 将结果转换回实数形式并展平最后两个维度return torch.view_as_real(pe_x).flatten(-2)class MLLAttention(nn.Module):r""" Linear Attention with LePE and RoPE.Args:dim (int): Number of input channels.num_heads (int): Number of attention heads.qkv_bias (bool, optional):  If True, add a learnable bias to query, key, value. Default: True"""def __init__(self, dim=3, input_resolution=[160, 160], num_heads=4, qkv_bias=True, **kwargs):super().__init__()self.dim = dimself.input_resolution = input_resolutionself.num_heads = num_headsself.qk = nn.Linear(dim, dim * 2, bias=qkv_bias)self.elu = nn.ELU()self.lepe = nn.Conv2d(dim, dim, 3, padding=1, groups=dim)self.rope = RoPE()def forward(self, x):"""Args:x: input features with shape of (B, N, C)"""x = x.reshape((x.size(0), x.size(2) * x.size(3), x.size(1)))b, n, c = x.shapeh = int(n ** 0.5)w = int(n ** 0.5)# self.rope = RoPE(shape=(h, w, self.dim))num_heads = self.num_headshead_dim = c // num_headsqk = self.qk(x).reshape(b, n, 2, c).permute(2, 0, 1, 3)q, k, v = qk[0], qk[1], x# q, k, v: b, n, cq = self.elu(q) + 1.0k = self.elu(k) + 1.0q_rope = self.rope(q.reshape(b, h, w, c)).reshape(b, n, num_heads, head_dim).permute(0, 2, 1, 3)k_rope = self.rope(k.reshape(b, h, w, c)).reshape(b, n, num_heads, head_dim).permute(0, 2, 1, 3)q = q.reshape(b, n, num_heads, head_dim).permute(0, 2, 1, 3)k = k.reshape(b, n, num_heads, head_dim).permute(0, 2, 1, 3)v = v.reshape(b, n, num_heads, head_dim).permute(0, 2, 1, 3)z = 1 / (q @ k.mean(dim=-2, keepdim=True).transpose(-2, -1) + 1e-6)kv = (k_rope.transpose(-2, -1) * (n ** -0.5)) @ (v * (n ** -0.5))x = q_rope @ kv * zx = x.transpose(1, 2).reshape(b, n, c)v = v.transpose(1, 2).reshape(b, h, w, c).permute(0, 3, 1, 2)x = x + self.lepe(v).permute(0, 2, 3, 1).reshape(b, n, c)x = x.transpose(2, 1).reshape((b, c, h, w))return xdef extra_repr(self) -> str:return f'dim={self.dim}, num_heads={self.num_heads}'if __name__ == "__main__":# Generating Sample imageimage_size = (1, 64, 160, 160)image = torch.rand(*image_size)# Modelmodel = MLLAttention(64)out = model(image)print(out.size())
四、手把手教你添加MLLA
4.1 修改一
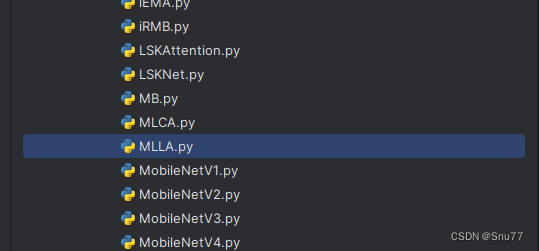
第一还是建立文件,我们找到如下ultralytics/nn文件夹下建立一个目录名字呢就是'Addmodules'文件夹(用群内的文件的话已经有了无需新建)!然后在其内部建立一个新的py文件将核心代码复制粘贴进去即可。
4.2 修改二
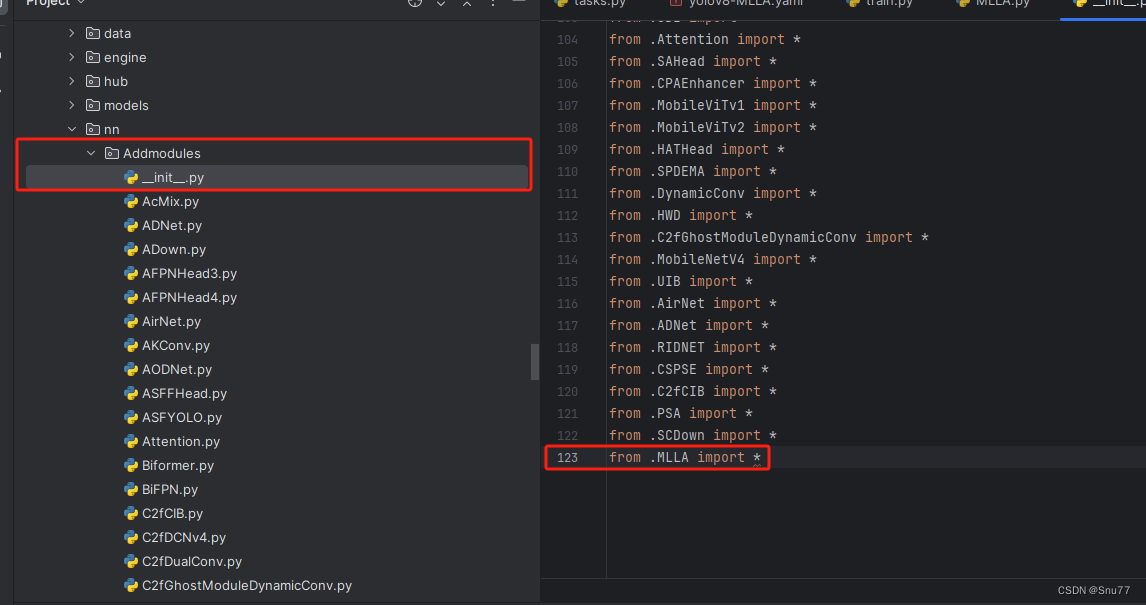
第二步我们在该目录下创建一个新的py文件名字为'__init__.py'(用群内的文件的话已经有了无需新建),然后在其内部导入我们的检测头如下图所示。
4.3 修改三
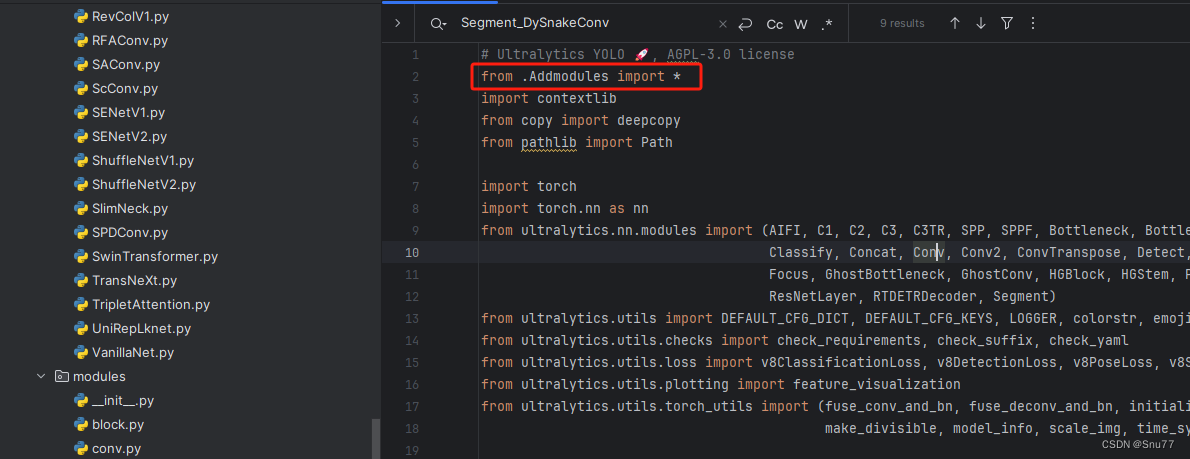
第三步我门中到如下文件'ultralytics/nn/tasks.py'进行导入和注册我们的模块(用群内的文件的话已经有了无需重新导入直接开始第四步即可)!
从今天开始以后的教程就都统一成这个样子了,因为我默认大家用了我群内的文件来进行修改!!
4.4 修改四
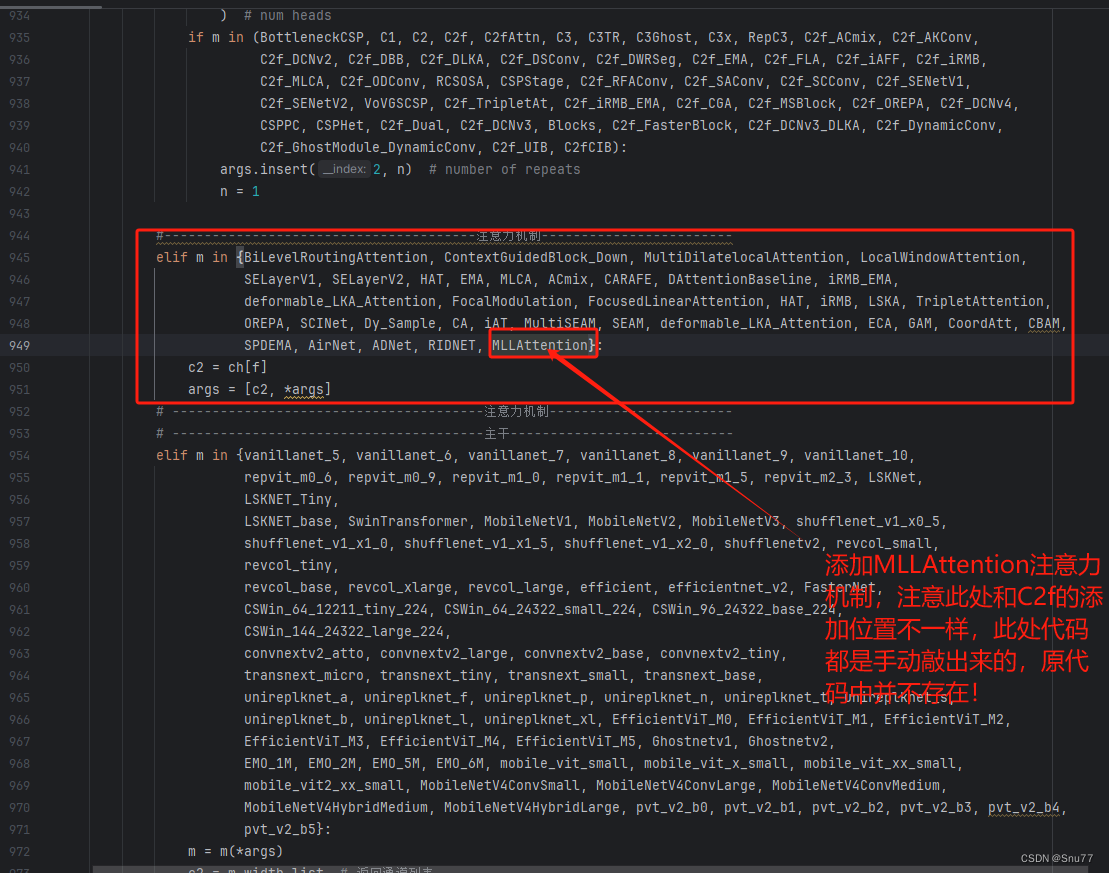
按照我的添加在parse_model里添加即可。
4.5 修改五
找到ultralytics/models/yolo/detect/train.py的DetectionTrainer class中的build_dataset函数中的rect=mode == 'val'改为rect=False
到此就修改完成了,大家可以复制下面的yaml文件运行。
五、MLLA的yaml文件和运行记录
5.1 MLLA的yaml文件1
# Ultralytics YOLO 🚀, AGPL-3.0 license
# YOLOv8 object detection model with P3-P5 outputs. For Usage examples see https://docs.ultralytics.com/tasks/detect# Parameters
nc: 80  # number of classes
scales: # model compound scaling constants, i.e. 'model=yolov8n.yaml' will call yolov8.yaml with scale 'n'# [depth, width, max_channels]n: [0.33, 0.25, 1024]  # YOLOv8n summary: 225 layers,  3157200 parameters,  3157184 gradients,   8.9 GFLOPss: [0.33, 0.50, 1024]  # YOLOv8s summary: 225 layers, 11166560 parameters, 11166544 gradients,  28.8 GFLOPsm: [0.67, 0.75, 768]   # YOLOv8m summary: 295 layers, 25902640 parameters, 25902624 gradients,  79.3 GFLOPsl: [1.00, 1.00, 512]   # YOLOv8l summary: 365 layers, 43691520 parameters, 43691504 gradients, 165.7 GFLOPsx: [1.00, 1.25, 512]   # YOLOv8x summary: 365 layers, 68229648 parameters, 68229632 gradients, 258.5 GFLOP# YOLOv8.0n backbone
backbone:# [from, repeats, module, args]- [-1, 1, Conv, [64, 3, 2]]  # 0-P1/2- [-1, 1, Conv, [128, 3, 2]]  # 1-P2/4- [-1, 3, C2f, [128, True]]- [-1, 1, Conv, [256, 3, 2]]  # 3-P3/8- [-1, 6, C2f, [256, True]]- [-1, 1, Conv, [512, 3, 2]]  # 5-P4/16- [-1, 6, C2f, [512, True]]- [-1, 1, Conv, [1024, 3, 2]]  # 7-P5/32- [-1, 3, C2f, [1024, True]]- [-1, 1, SPPF, [1024, 5]]  # 9# YOLOv8.0n head
head:- [-1, 1, nn.Upsample, [None, 2, 'nearest']]- [[-1, 6], 1, Concat, [1]]  # cat backbone P4- [-1, 3, C2f, [512]]  # 12- [-1, 1, nn.Upsample, [None, 2, 'nearest']]- [[-1, 4], 1, Concat, [1]]  # cat backbone P3- [-1, 3, C2f, [256]]  # 15 (P3/8-small)- [-1, 1, Conv, [256, 3, 2]]- [[-1, 12], 1, Concat, [1]]  # cat head P4- [-1, 3, C2f, [512]]  # 18 (P4/16-medium)- [-1, 1, Conv, [512, 3, 2]]- [[-1, 9], 1, Concat, [1]]  # cat head P5- [-1, 3, C2f, [1024]]  # 21 (P5/32-large)- [-1, 1, MLLAttention, []]  # 22 (P5/32-large) # 添加在大目标检测层后!- [[15, 18, 22], 1, Detect, [nc]]  # Detect(P3, P4, P5)
5.2 MLLA的yaml文件2
在所有目标检测曾后面添加!
# Ultralytics YOLO 🚀, AGPL-3.0 license
# YOLOv8 object detection model with P3-P5 outputs. For Usage examples see https://docs.ultralytics.com/tasks/detect# Parameters
nc: 80  # number of classes
scales: # model compound scaling constants, i.e. 'model=yolov8n.yaml' will call yolov8.yaml with scale 'n'# [depth, width, max_channels]n: [0.33, 0.25, 1024]  # YOLOv8n summary: 225 layers,  3157200 parameters,  3157184 gradients,   8.9 GFLOPss: [0.33, 0.50, 1024]  # YOLOv8s summary: 225 layers, 11166560 parameters, 11166544 gradients,  28.8 GFLOPsm: [0.67, 0.75, 768]   # YOLOv8m summary: 295 layers, 25902640 parameters, 25902624 gradients,  79.3 GFLOPsl: [1.00, 1.00, 512]   # YOLOv8l summary: 365 layers, 43691520 parameters, 43691504 gradients, 165.7 GFLOPsx: [1.00, 1.25, 512]   # YOLOv8x summary: 365 layers, 68229648 parameters, 68229632 gradients, 258.5 GFLOP# YOLOv8.0n backbone
backbone:# [from, repeats, module, args]- [-1, 1, Conv, [64, 3, 2]]  # 0-P1/2- [-1, 1, Conv, [128, 3, 2]]  # 1-P2/4- [-1, 3, C2f, [128, True]]- [-1, 1, Conv, [256, 3, 2]]  # 3-P3/8- [-1, 6, C2f, [256, True]]- [-1, 1, Conv, [512, 3, 2]]  # 5-P4/16- [-1, 6, C2f, [512, True]]- [-1, 1, Conv, [1024, 3, 2]]  # 7-P5/32- [-1, 3, C2f, [1024, True]]- [-1, 1, SPPF, [1024, 5]]  # 9# YOLOv8.0n head
head:- [-1, 1, nn.Upsample, [None, 2, 'nearest']]- [[-1, 6], 1, Concat, [1]]  # cat backbone P4- [-1, 3, C2f, [512]]  # 12- [-1, 1, nn.Upsample, [None, 2, 'nearest']]- [[-1, 4], 1, Concat, [1]]  # cat backbone P3- [-1, 3, C2f, [256]]  # 15 (P3/8-small)- [-1, 1, MLLAttention, []]  # 16 (P4/16-medium)- [-1, 1, Conv, [256, 3, 2]]- [[-1, 12], 1, Concat, [1]]  # cat head P4- [-1, 3, C2f, [512]]  # 19 (P4/16-medium)- [-1, 1, MLLAttention, [512]]  # 20 (P4/16-medium)- [-1, 1, Conv, [512, 3, 2]]- [[-1, 9], 1, Concat, [1]]  # cat head P5- [-1, 3, C2f, [1024]]  # 23 (P5/32-large)- [-1, 1, MLLAttention, []]  # 24 (P5/32-large) # 添加在大目标检测层后!- [[16, 20, 24], 1, Detect, [nc]]  # Detect(P3, P4, P5)
5.3 MLLA的yaml文件3
添加在主干网络的尾部!
# Ultralytics YOLO 🚀, AGPL-3.0 license
# YOLOv8 object detection model with P3-P5 outputs. For Usage examples see https://docs.ultralytics.com/tasks/detect# Parameters
nc: 80  # number of classes
scales: # model compound scaling constants, i.e. 'model=yolov8n.yaml' will call yolov8.yaml with scale 'n'# [depth, width, max_channels]n: [0.33, 0.25, 1024]  # YOLOv8n summary: 225 layers,  3157200 parameters,  3157184 gradients,   8.9 GFLOPss: [0.33, 0.50, 1024]  # YOLOv8s summary: 225 layers, 11166560 parameters, 11166544 gradients,  28.8 GFLOPsm: [0.67, 0.75, 768]   # YOLOv8m summary: 295 layers, 25902640 parameters, 25902624 gradients,  79.3 GFLOPsl: [1.00, 1.00, 512]   # YOLOv8l summary: 365 layers, 43691520 parameters, 43691504 gradients, 165.7 GFLOPsx: [1.00, 1.25, 512]   # YOLOv8x summary: 365 layers, 68229648 parameters, 68229632 gradients, 258.5 GFLOP# YOLOv8.0n backbone
backbone:# [from, repeats, module, args]- [-1, 1, Conv, [64, 3, 2]]  # 0-P1/2- [-1, 1, Conv, [128, 3, 2]]  # 1-P2/4- [-1, 3, C2f, [128, True]]- [-1, 1, Conv, [256, 3, 2]]  # 3-P3/8- [-1, 6, C2f, [256, True]]- [-1, 1, Conv, [512, 3, 2]]  # 5-P4/16- [-1, 6, C2f, [512, True]]- [-1, 1, Conv, [1024, 3, 2]]  # 7-P5/32- [-1, 3, C2f, [1024, True]]- [-1, 1, SPPF, [1024, 5]]  # 9- [-1, 1, MLLAttention, [1024]]  # 10# YOLOv8.0n head
head:- [-1, 1, nn.Upsample, [None, 2, 'nearest']]- [[-1, 6], 1, Concat, [1]]  # cat backbone P4- [-1, 3, C2f, [512]]  # 13- [-1, 1, nn.Upsample, [None, 2, 'nearest']]- [[-1, 4], 1, Concat, [1]]  # cat backbone P3- [-1, 3, C2f, [256]]  # 16 (P3/8-small)- [-1, 1, Conv, [256, 3, 2]]- [[-1, 13], 1, Concat, [1]]  # cat head P4- [-1, 3, C2f, [512]]  # 19 (P4/16-medium)- [-1, 1, Conv, [512, 3, 2]]- [[-1, 10], 1, Concat, [1]]  # cat head P5- [-1, 3, C2f, [1024]]  # 22 (P5/32-large)- [[16, 19, 22], 1, Detect, [nc]]  # Detect(P3, P4, P5)
5.4 训练代码
大家可以创建一个py文件将我给的代码复制粘贴进去,配置好自己的文件路径即可运行。
import warnings
warnings.filterwarnings('ignore')
from ultralytics import YOLOif __name__ == '__main__':model = YOLO('yolov8-MLLA.yaml')# 如何切换模型版本, 上面的ymal文件可以改为 yolov8s.yaml就是使用的v8s,# 类似某个改进的yaml文件名称为yolov8-XXX.yaml那么如果想使用其它版本就把上面的名称改为yolov8l-XXX.yaml即可(改的是上面YOLO中间的名字不是配置文件的)!# model.load('yolov8n.pt') # 是否加载预训练权重,科研不建议大家加载否则很难提升精度model.train(data=r"C:\Users\Administrator\PycharmProjects\yolov5-master\yolov5-master\Construction Site Safety.v30-raw-images_latestversion.yolov8\data.yaml",# 如果大家任务是其它的'ultralytics/cfg/default.yaml'找到这里修改task可以改成detect, segment, classify, posecache=False,imgsz=640,epochs=150,single_cls=False,  # 是否是单类别检测batch=16,close_mosaic=0,workers=0,device='0',optimizer='SGD', # using SGD# resume='runs/train/exp21/weights/last.pt', # 如过想续训就设置last.pt的地址amp=True,  # 如果出现训练损失为Nan可以关闭ampproject='runs/train',name='exp',)
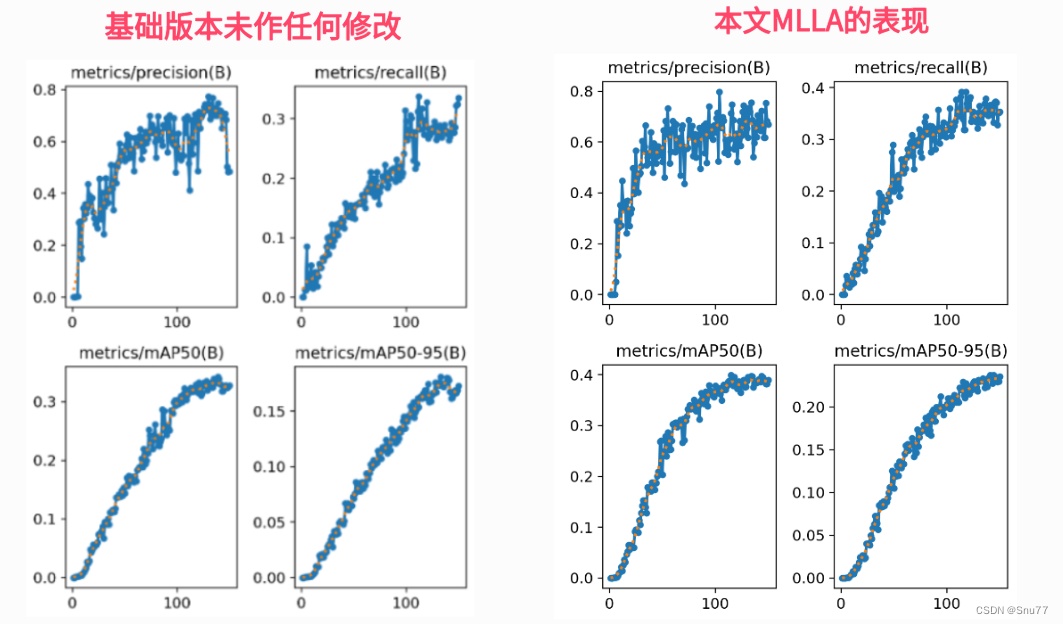
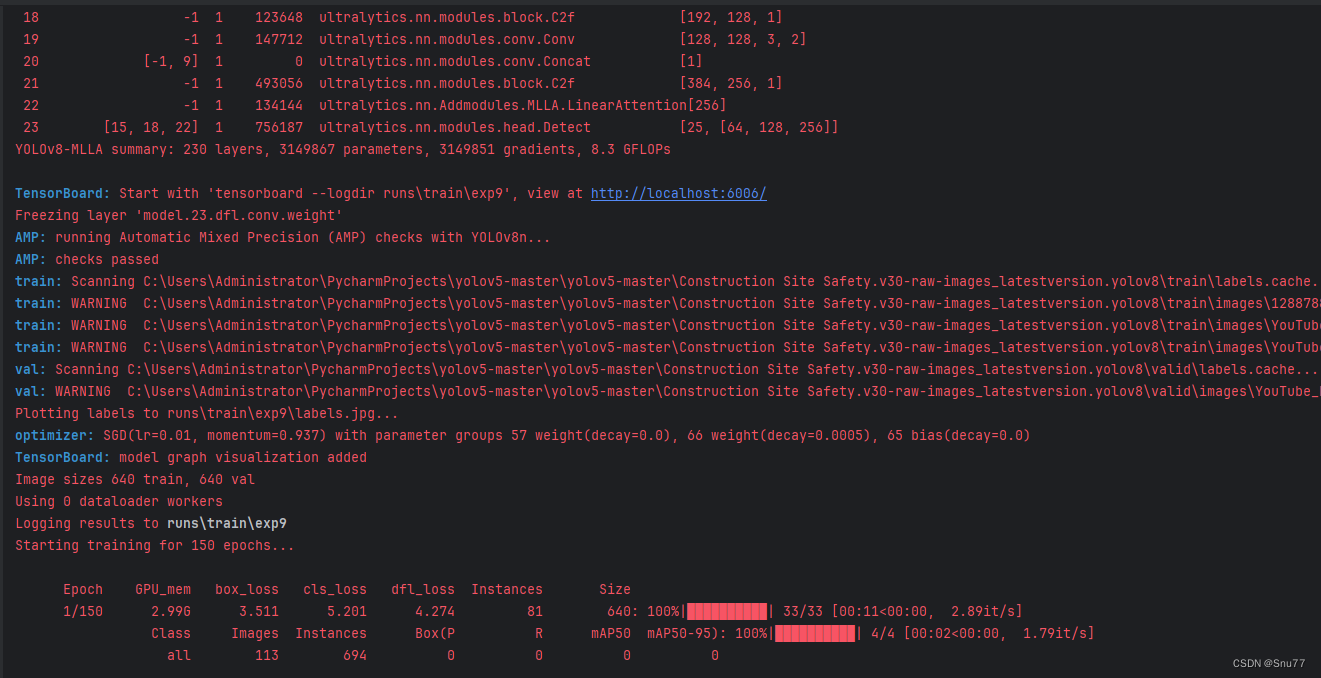
5.5MLLA的训练过程截图
五、本文总结
到此本文的正式分享内容就结束了,在这里给大家推荐我的YOLOv8改进有效涨点专栏,本专栏目前为新开的平均质量分98分,后期我会根据各种最新的前沿顶会进行论文复现,也会对一些老的改进机制进行补充,如果大家觉得本文帮助到你了,订阅本专栏,关注后续更多的更新~
专栏目录:YOLOv8改进有效系列目录 | 包含卷积、主干、检测头、注意力机制、Neck上百种创新机制


