
项目地址https://gitee.com/sybb011016/test_build
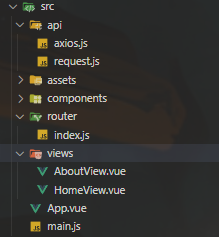
打包通过按钮的形式请求接口,让后端进行打包,后端使用express-generator搭建模版。前端项目就在npm init vue@latest基础上添加了路由
如果只想打包AboutView组件,首先修改后端接口。
//打包的测试接口
router.get("/build", function (req, res) {//打包的文件路径const frontendProjectPath = "E:\\BaiduNetdiskDownload\\Vue.js\\vue_build";const component = req.query.component || ""; //传入的参数//根据参数决定打包指定目录还是全部打包 cross-env需要前端下载,运行的时候动态设置环境变量const buildCommand = component? `cross-env BUILD_COMPONENT=${component} npm run build`: `npm run build`;exec(buildCommand, { cwd: frontendProjectPath }, (err, stdout, stderr) => {if (err) {console.error(`exec error: ${err}`);return res.status(500).send(`Error during build: ${err.message}`);}console.log(`stdout: ${stdout}`);console.error(`stderr: ${stderr}`);res.send("Build completed successfully");});
});
前端部分接口如下
export const buildAPI = (comp) => {return request({url: "/build",method: "GET",params: {component: comp,},});
};
let res = await buildAPI("About");
修改vite.config.ts配置
export default defineConfig(({ command, mode }) => {//后端接口执行的时候会设置环境变量const input = process.env.BUILD_COMPONENT? path.resolve(__dirname,`src/views/${process.env.BUILD_COMPONENT}View.vue`): path.resolve(__dirname, "index.html");return {....build: {rollupOptions: {input,},},};
});
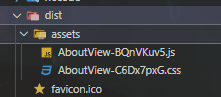
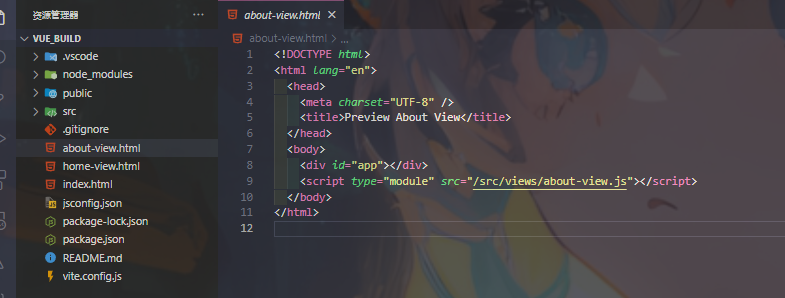
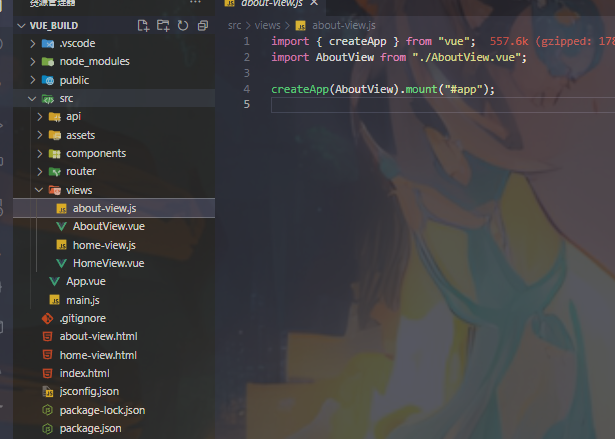
上面只是打包aboutview相关的js和css,但是并没有html查看,现在为aboutview添加一个html和js作为入口文件用于汇众所有的相关的数据。
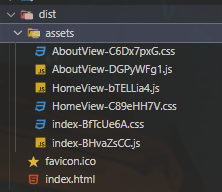
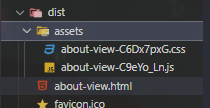
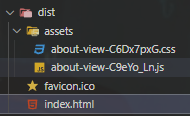
修改vite.config.ts文件内容,下面插件的功能主要是为了修改打包后的入口文件名为index。base: "./"该属性必须添加,否则打包后的目录进行本地预览会显示文件的情况,建议也把重命名的方法添加上,否则刷新可能还是会出现本地文件夹的情况
import { defineConfig } from "vite";
import vue from "@vitejs/plugin-vue";
import path from "node:path";
import { fileURLToPath, URL } from "node:url";
import fs from "fs/promises";//重命名打包后的about-view.html文件为index.html
const renamePlugin = (originalName, newName) => {return {name: "rename-output-html",closeBundle: async () => {const distPath = path.resolve(__dirname, "dist");const originalPath = path.join(distPath, originalName);const newPath = path.join(distPath, newName);try {await fs.rename(originalPath, newPath);console.log(`Renamed ${originalName} to ${newName}`);} catch (err) {console.error(`Failed to rename ${originalName} to ${newName}:`, err);}},};
};export default defineConfig(() => {// 检测是否设置了环境变量BUILD_COMPONENTconst isComponentBuild = process.env.BUILD_COMPONENT;return {.....base: "./",plugins: [vue(), renamePlugin("about-view.html", "index.html")],build: {rollupOptions: {input:isComponentBuild == "About"? path.resolve(__dirname, "about-view.html"): path.resolve(__dirname, "index.html"),output: {entryFileNames: "assets/[name]-[hash].js", //打包后的index [name]代表使用组件原有名字 [hash]代表hash随机值chunkFileNames: "assets/[name]-[hash].js", //打包后各个组件名的jsassetFileNames: "assets/[name]-[hash].[ext]", //打包后各个组件的css},},outDir: "dist",},};
});
不使用插件
使用插件
现在我们添加单独的路由模块(这里假设我们的AboutView中需要读取router.params中的某属性),因此在单独打包之前需要在AboutView.js中创建并引入路由模块,注意这里需要配置单独的路由地址。
import { createApp } from "vue";
import AboutView from "./AboutView.vue";import { createRouter, createWebHistory } from "vue-router";const router = createRouter({history: createWebHistory(),routes: [{path: "/about",name: "about",component: AboutView,},],
});createApp(AboutView).use(router).mount("#app");
模拟请求传参返回随机数更新标题。这里route.params.id只是随便模拟的东西,无值,主要是验证route非空,未单独引入use(router)的情况下读取未undefined。
const route = useRoute();
const title = ref("This is an about page");
onMounted(() => {console.log(route);getDataAPI(route.params.id).then((res) => {title.value = res.data.title;});
});
然后将AboutView的文件单独打包,这里直接部署到宝塔的本地环境中。需要修改一些nginx的参数。文件上传到如下结构。


配置nginx
location / { try_files $uri $uri/ /index.html last;index index.html;
}
location /api {proxy_pass http://127.0.0.1:3001;rewrite ^/api/(.*)$ /$1 break;
}//下面选择性添加add_header 'Access-Control-Allow-Origin' '*' always; #允许来自所有的访问地址 add_header 'Access-Control-Allow-Credentials' 'true' always; #允许来自所有的访问地址 add_header 'Access-Control-Allow-Headers' 'Origin, X-Requested-With, Content-Type, Accept, token, platform' always; add_header 'Access-Control-Allow-Methods' 'GET,POST,PUT,DELETE,HEAD,OPTIONS' always; #允许来自所有的访问地址
运行单独打包的AboutView

可以正确访问接受数据更新


 "vue3+vite+nodejs,通过接口的形式请求后端打包(可打包全部或指定打包组件)")


